For locations without a permanent water supply, the Shaker Touch 2 can run from a water tank. Depending on production date, your machine ships with either ULKA pumps or 24V pumps — the connection steps are identical, only the default pump pressure setting differs. Both configurations are covered below.
Pump types — ULKA vs 24V
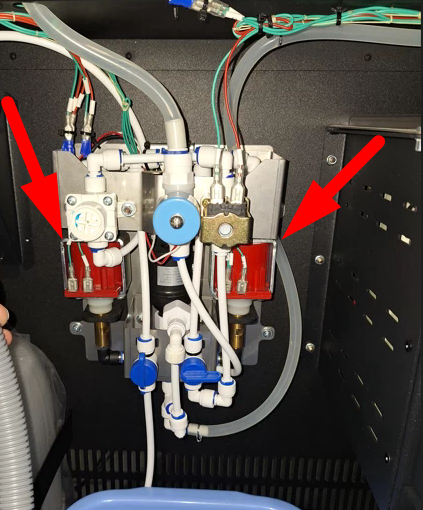
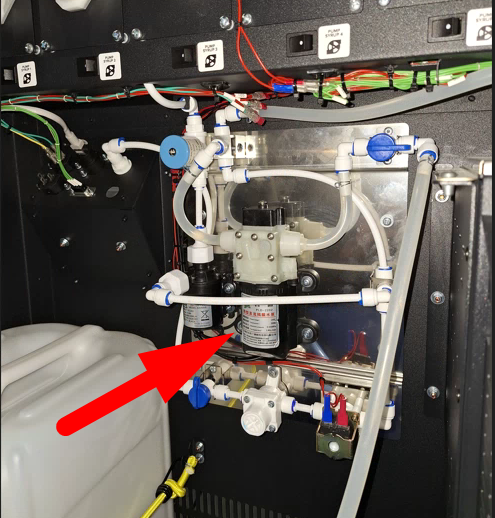
Identifying which pump your machine has is important because the default Water PWM setting differs between the two. You can check by opening the back panel and comparing with the reference photos:
- ULKA pump — see reference photo. Default Water PWM: 40%.
- 24V pump — see reference photo. Default Water PWM: 70%.
Note the type before continuing — you will need it in the Pump setup section below.
Connection procedure
The steps below are the same for both ULKA and 24V pump configurations.
- Place a container with water inside the machine.
- Lower the water intake hose into the container.
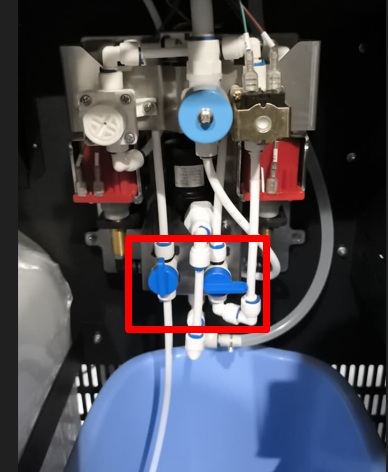
- Turn the hydraulic line valves to supply water from the container.
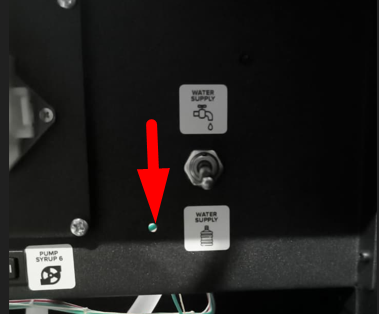
- Set the water supply switch to the pump operation position.
- Turn on the machine’s main power switch and wait for the software to load. After startup, the pumps will turn on for 2-3 seconds.
- Press the SERVICE MODE button, then tap “Water Pumping” on the screen. Continue pumping until the hydraulic line is full and water flows from the hoses.
- Press buttons 1-4 to rinse all mixers in turn until water comes out.
- Press the CONTROLLER REBOOT button or reset the machine from the screen on the Drinks tab.
- Make sure that “Error 1 No water” is not displayed on the screen after restarting the machine.
Pump setup
If water is supplied after connecting, but Error 1 “No water” persists after rebooting, the water level in the mixer needs to be adjusted. Run a pumping cycle in the service menu and compare the flow rate with the image below:

If the water level is below the green line, increase the water flow. Open the service menu and go to Configurator → Service Menu, then find the “Water PWM Setting” option:
The default value depends on the pump type installed (see Pump types above):
- ULKA pumps — default 40%
- 24V pumps — default 70%
Moving the slider to the left will decrease the pressure; moving it to the right will increase it. To save the change, click the “Save” button.
Important: do not increase or decrease the pressure drastically. Change the value by 10% at a time, save, reboot the machine, and check whether Error 1 still appears. Repeat in 10% increments until water reaches the correct level in the funnel.
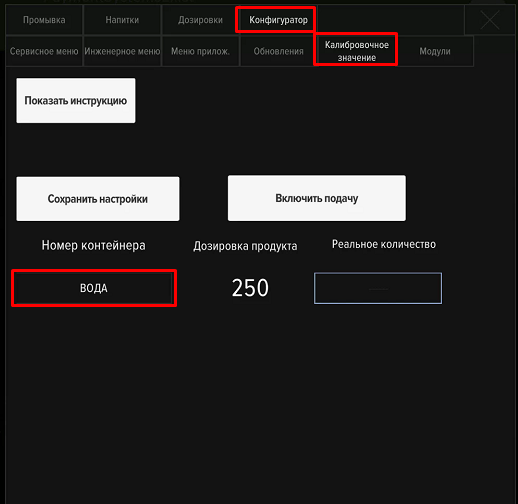
Water calibration (final step)
After the PWM setting is correct, calibrate the water output so that the machine dispenses the exact volume configured in each drink recipe. Without this step, dosing can be off by 10–20%, which directly affects how strong or weak each shake comes out.
- Open Service Menu → Developer Mode → Configurator → “Calibration value”.
- Place a measuring cup (300 ml or larger) under the dispensing nozzle.
- Run a calibration cycle — the machine dispenses a target volume.
- Read the actual volume from the cup and enter it on the screen. The machine recalculates its internal flow coefficient.
- Repeat 2–3 times until the actual volume matches the target within ±10 ml.
The water supply connection setup is complete.
Connecting the water bottle
Important — pump placement: Always keep the water pump at the very bottom of the water bottle, fully submerged. Running the pump dry (without water) overheats and burns out the motor.