Creating QR Access Keys
Give your team keyless door access — and, optionally, their own login to the iShaker telemetry web cabinet — using one shared workflow.
QR access keys let you and your team unlock the machine door with a phone or printed QR instead of a physical key. Each key is tied to a specific employee, can be limited to specific machines, can be revoked at any time, and produces an activity log so you can see who opened which machine and when.
This guide shows how to add an employee, generate their QR key, set which machines they can open, and (optionally) give them their own login to the web cabinet.
Please note: the machine must be connected to the internet and registered in your iShaker telemetry account for QR keys to work.
Before you start
- An iShaker telemetry account, with the target machine already registered. If your machine is not yet registered, see Authorization and control of the machine in iShaker telemetry.
Step 1 — Open the Employees section
Sign in at manage.ishakerusa.com. In the left sidebar:
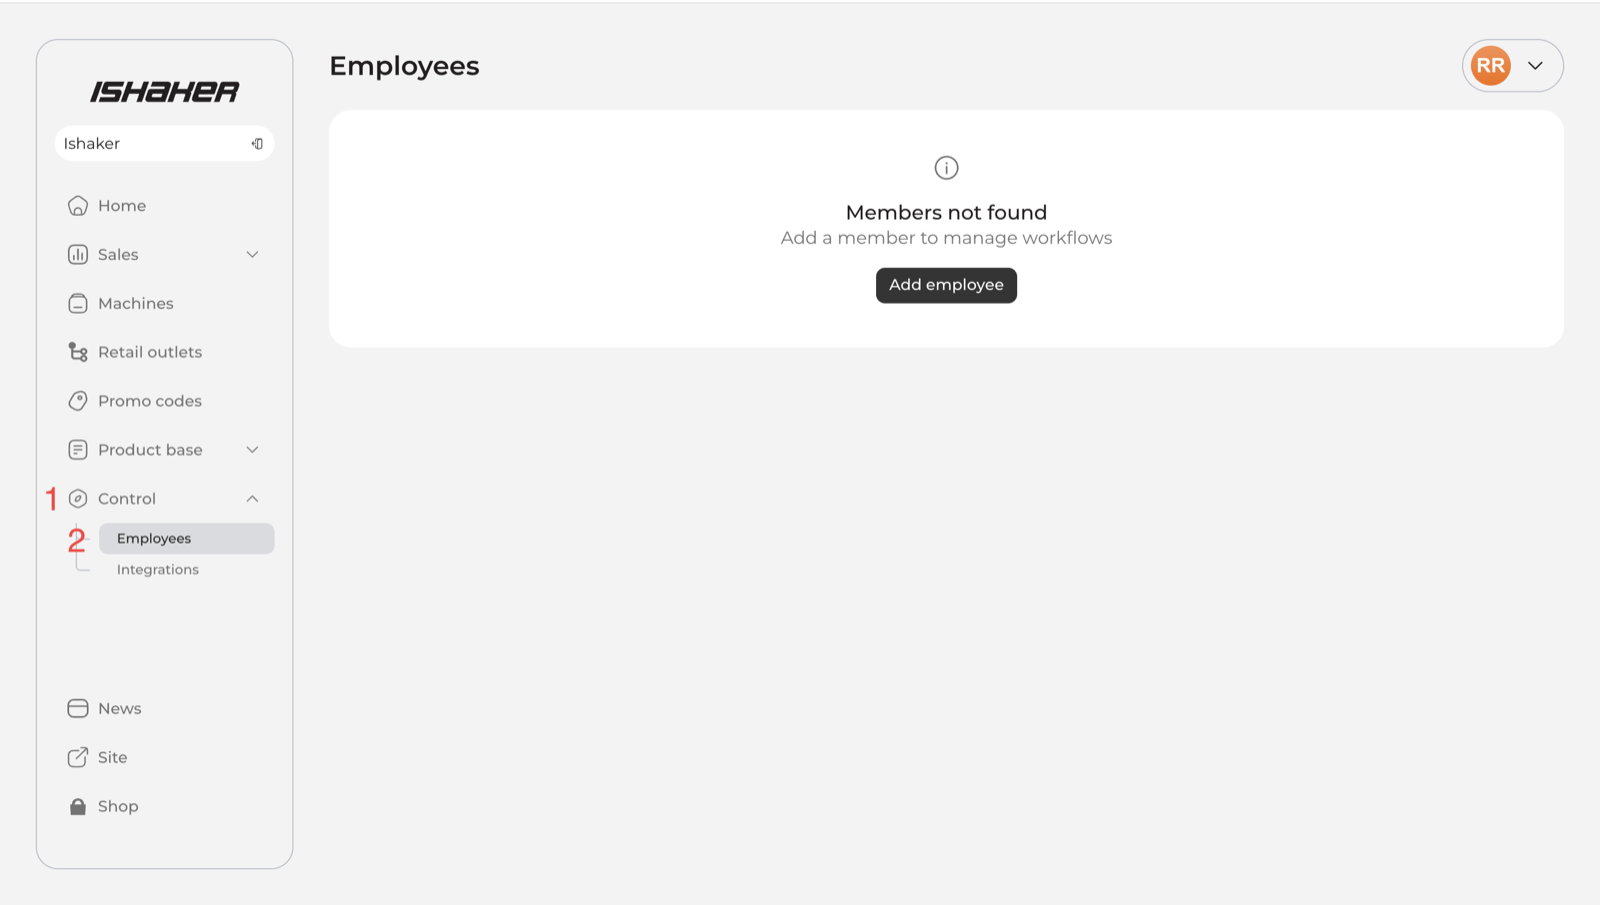
- Expand Control.
- Click Employees.
Step 2 — Add an employee
Click Add employee and fill in the form:
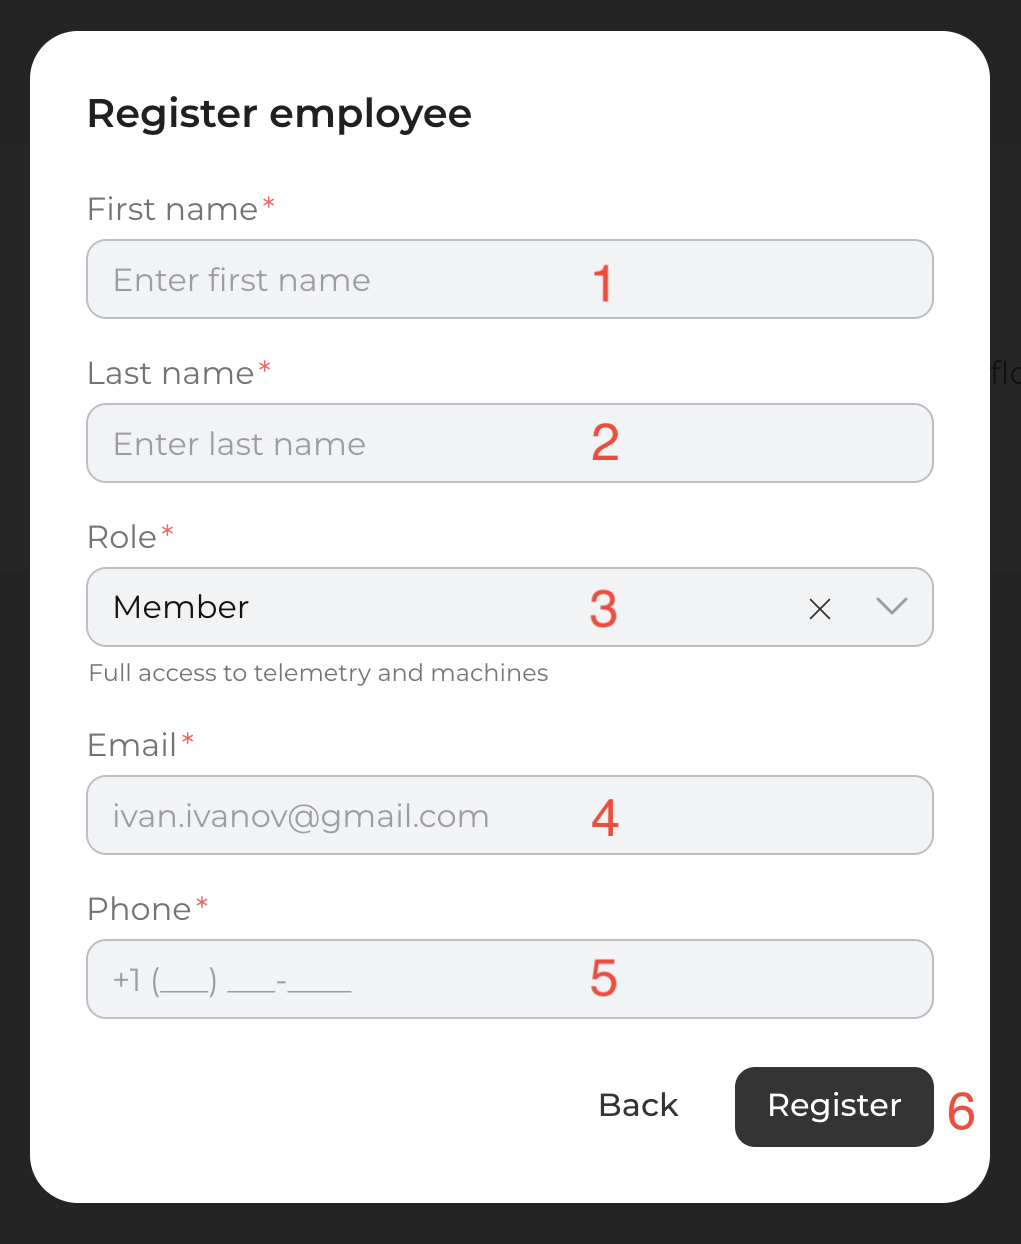
- First name.
- Last name.
- Role — pick the level that matches the person’s responsibilities:
- Member — full access to telemetry and machines (the default; suitable for staff who need to operate the machines).
- Other roles in the dropdown grant more limited permissions — choose them when you only want the person to view sales or telemetry without operational control.
- Email — the employee will use this email if you decide to give them a web cabinet login (Step 7).
- Phone.
- Click Register.
Step 3 — Open the employee, or use a quick action
The new employee appears in the list. There are three places you can click:
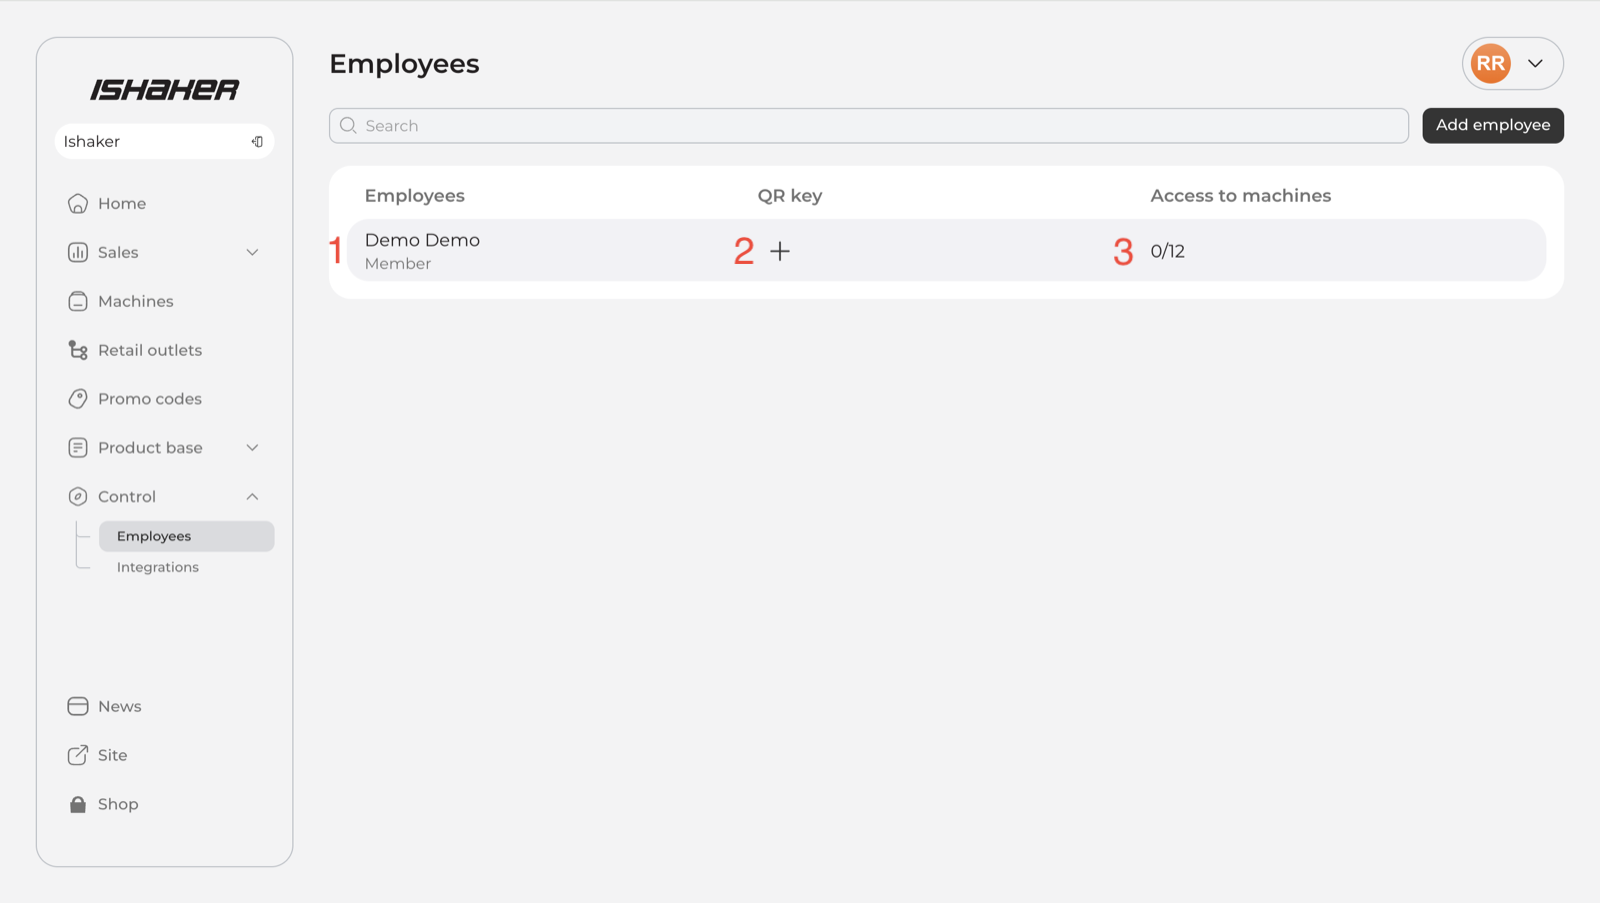
- The employee row — opens the full profile (recommended for the first time).
- The + icon in the QR key column — quick action to generate a QR key.
- The access counter in the Access to machines column — quick action to set machine permissions.
Step 4 — The employee profile
The profile is the central place for everything related to this person. It contains four sections:
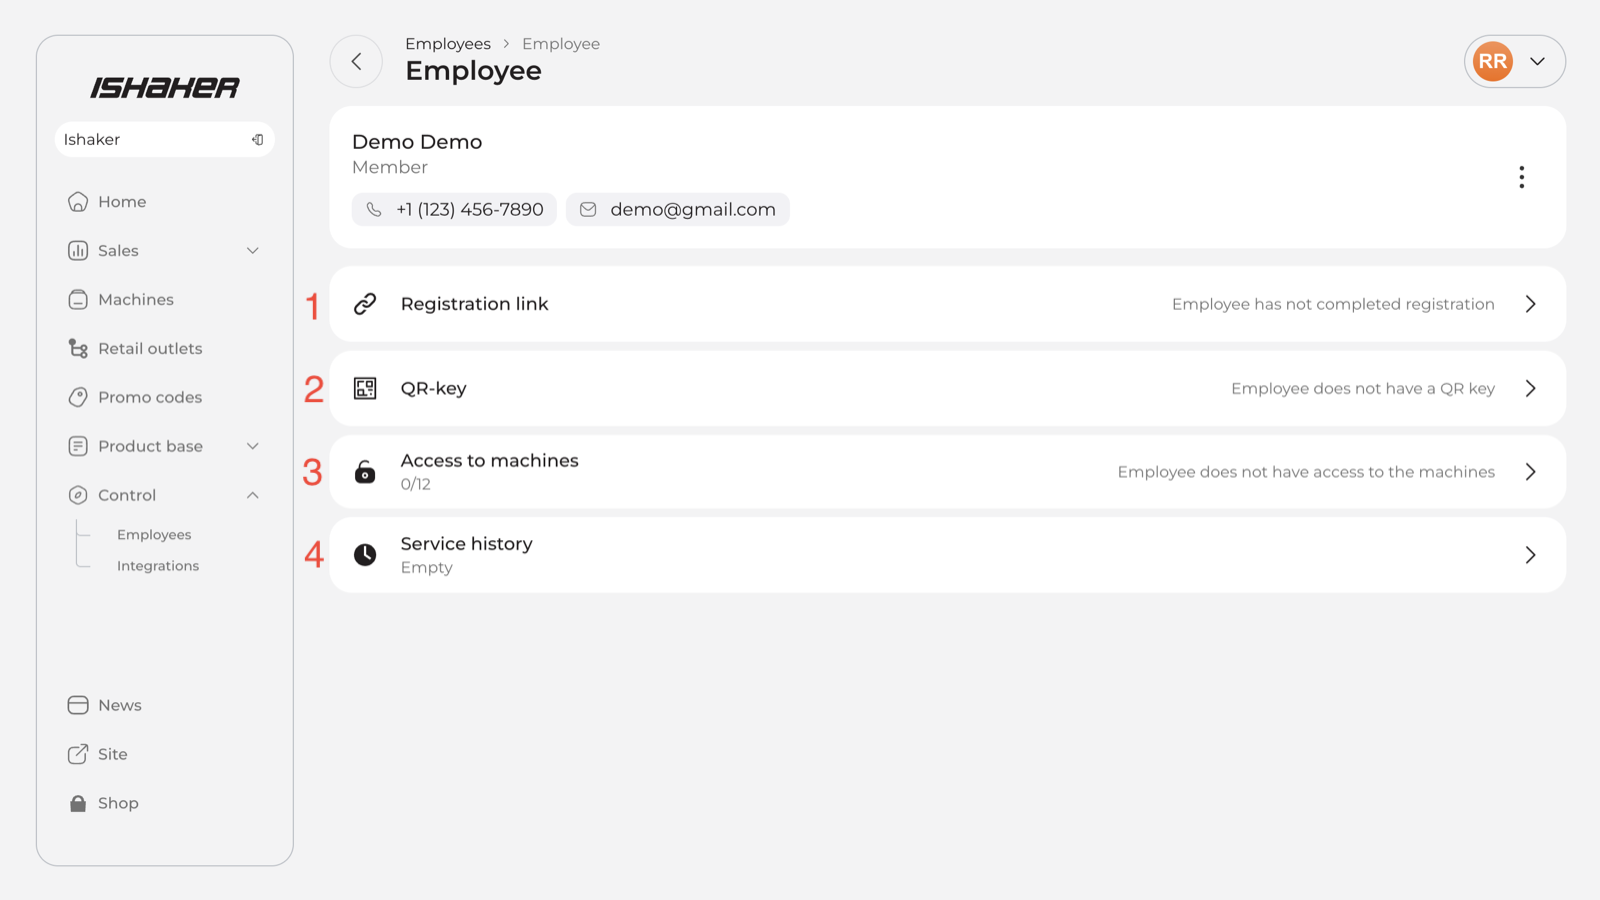
- Registration link — share with the employee so they can create a password and sign in to the web cabinet (optional, see Step 7).
- QR-key — generate the QR that opens the machine door (Step 5).
- Access to machines — pick which machines this employee can open and see (Step 6).
- Service history — log of who opened which machine, and when.
Step 5 — Generate the QR key
Open the QR-key section. The system generates a unique QR for this employee.
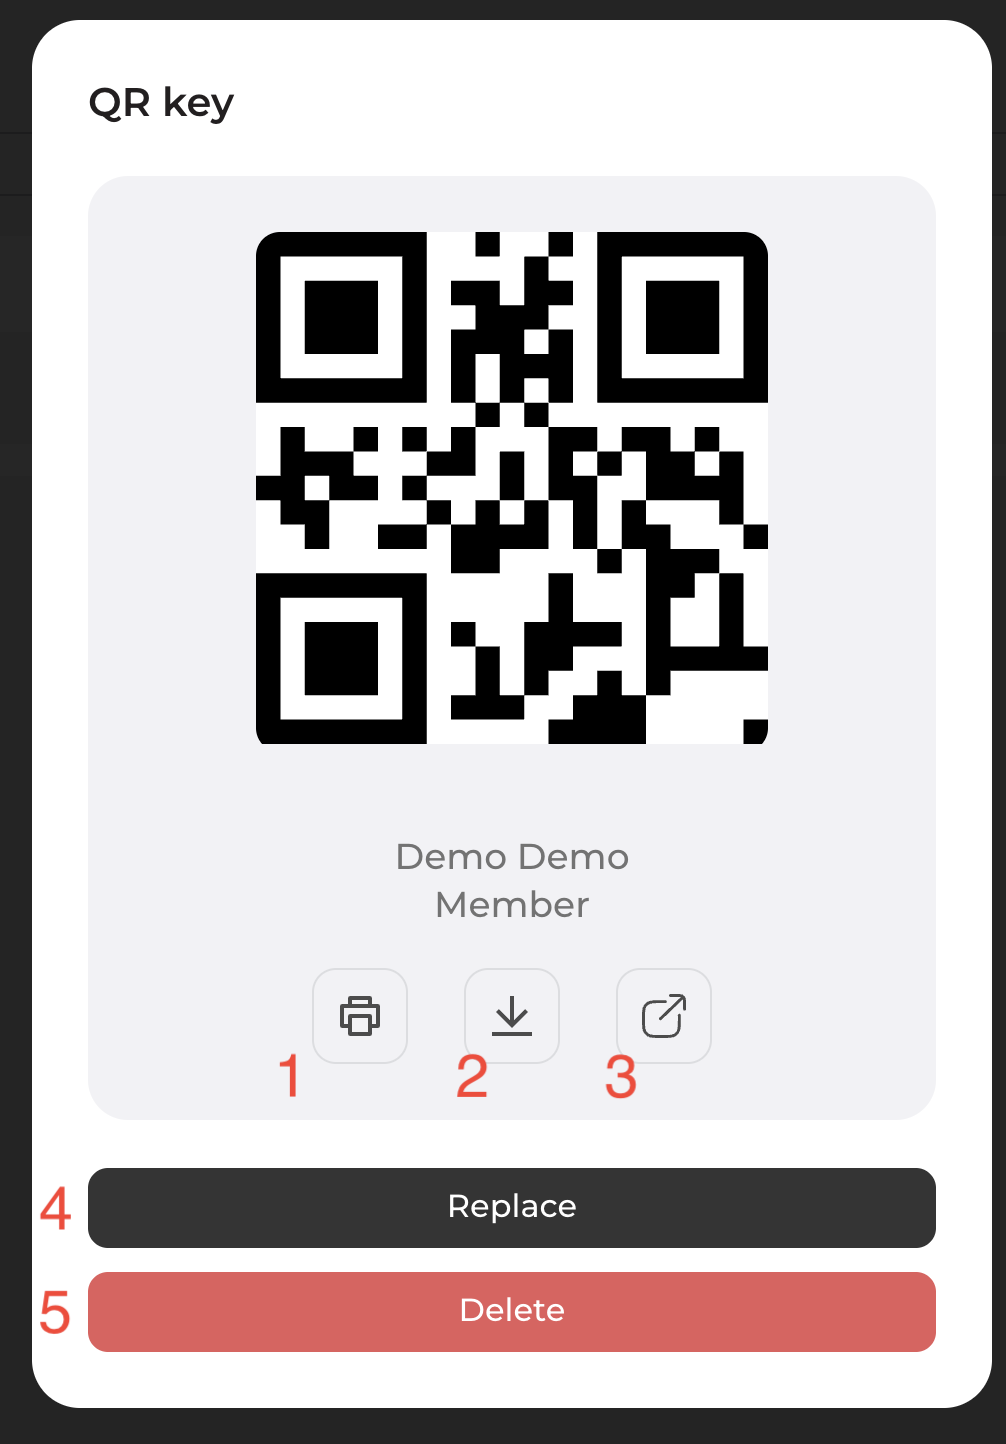
- Print the QR.
- Download the QR as an image.
- Open / share the QR via link.
- Replace — issue a new QR. The old QR is no longer accepted by the door scanner.
- Delete — revoke the employee’s QR access.
Treat each QR like a physical key. Anyone who has the image can open the machines it grants access to. Share over private channels only and do not post it where it could be photographed.
Step 6 — Set machine access
Open Access to machines. You can either grant access to every machine currently in your organization, or pick machines one by one.

- Toggle All machines to grant access to every machine currently in your organization.
- Or toggle individual machines from the list.
- Click Save.
Step 7 — (Optional) Send the registration link
If the employee should also see telemetry in the web cabinet, open Registration link and send them the invite. The dialog shows two steps that describe what happens on the employee’s side: they receive the link, and they create a password.
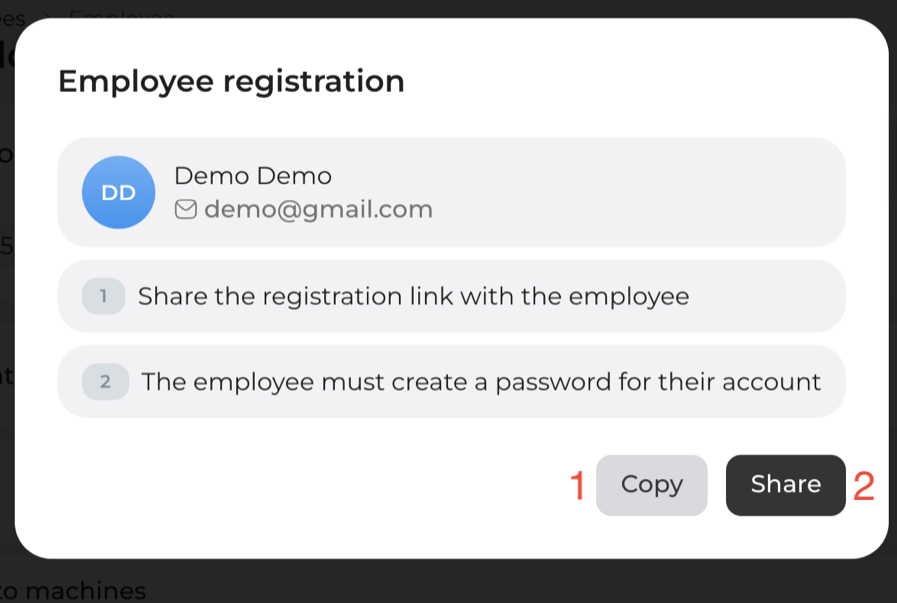
- Click Copy and paste the link into WhatsApp, email, or any private channel.
- Or use Share to open the native share menu on mobile.
Step 8 — What your employee sees: registration
When the employee opens the link, they land on a registration page with their info pre-filled (name, email, organization). They only set a password:
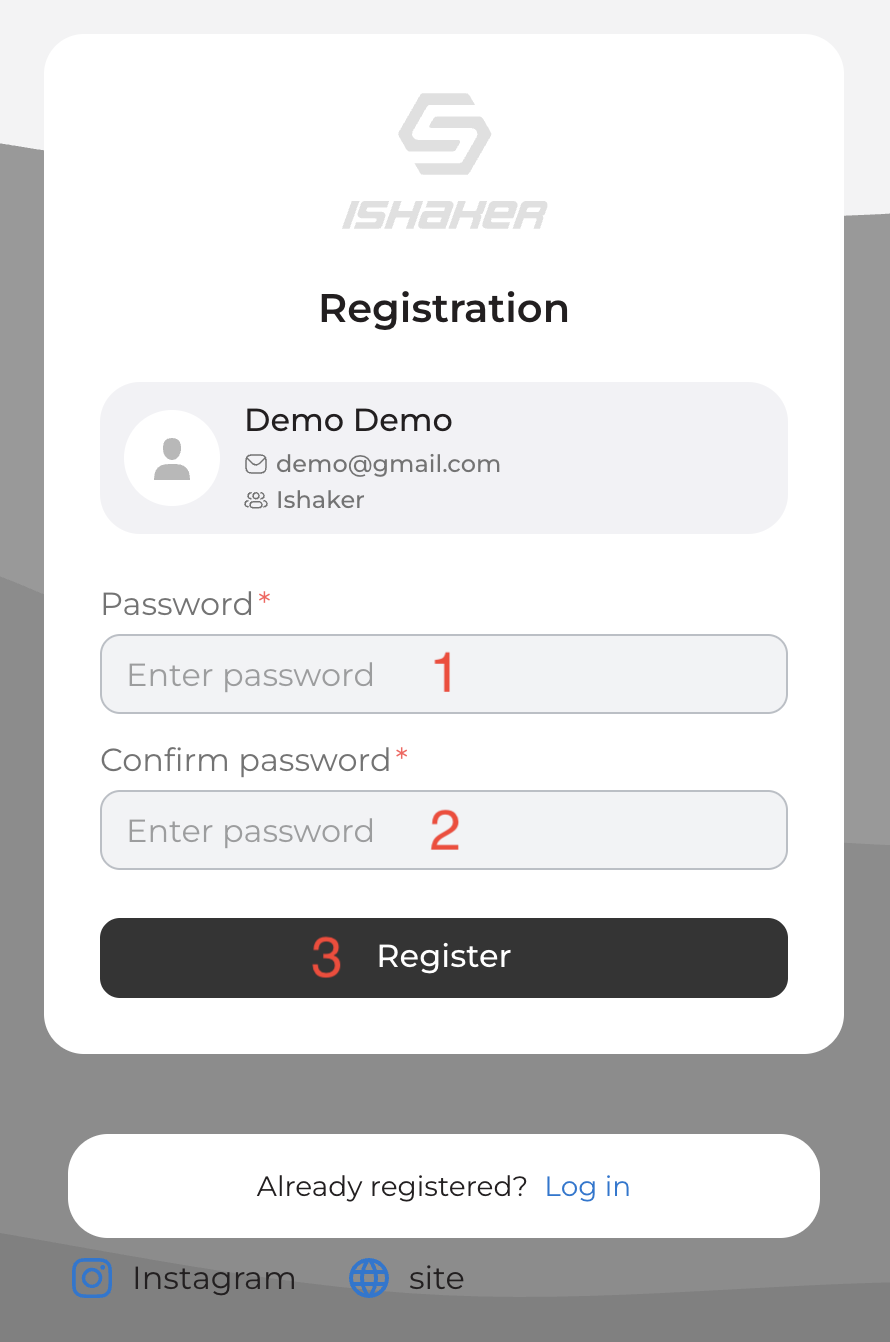
- Enter a Password.
- Confirm the password.
- Click Register.
Step 9 — Signing in afterwards
From then on, the employee signs in at manage.ishakerusa.com:
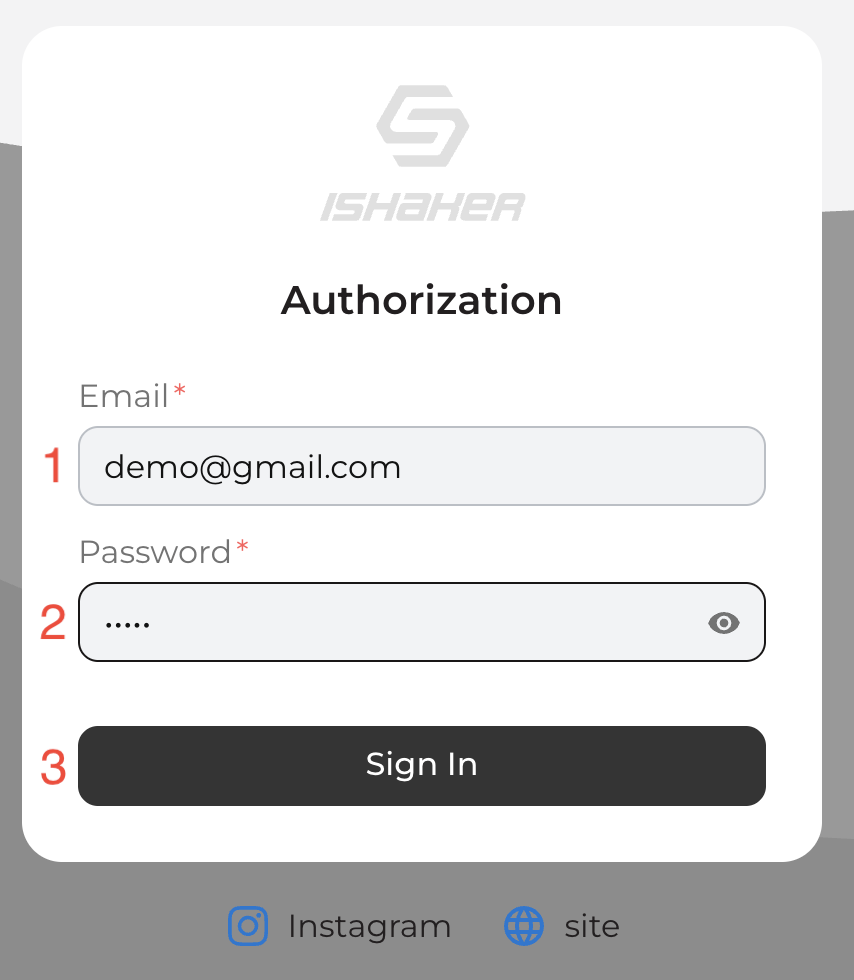
- Email — the same address you entered in Step 2.
- Password — the one the employee just created.
- Click Sign In.
Using the QR at the door
Hold the QR (on a phone screen or on paper) in front of the QR scanner mounted on the inside-facing side of the door. The door unlocks when the scanner reads a valid key.
Managing employees and keys
From the employee profile you can at any time:
- Replace the QR key — issue a new QR; the old one is no longer accepted by the door scanner.
- Delete the QR key — revoke door access without removing the employee.
- Change machine access — add or remove machines for that person.
- Review the Service history to see when each key was last used and which machine it opened.
What if my machines are not in the iShaker telemetry account?
QR keys require the machine to be registered in your iShaker telemetry account. If your machines are not registered, contact support@ishakerusa.com.
Need help?
If the QR scanner does not respond, the door does not unlock, or the Employees section is missing in your control panel, send a short description and (if possible) a photo to support@ishakerusa.com.