water_tank_connection_touch
This is an old revision of the document!
Connecting to a water tank using a pump (Touch)
Rules and procedure for connection:
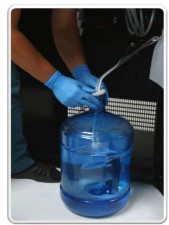
- Lower the pump to the bottom of thewater tank..
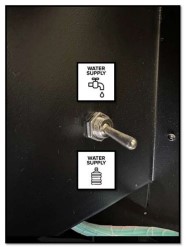
- Move the water supply switch to the down position.
- Turn the taps as shown in the picture.
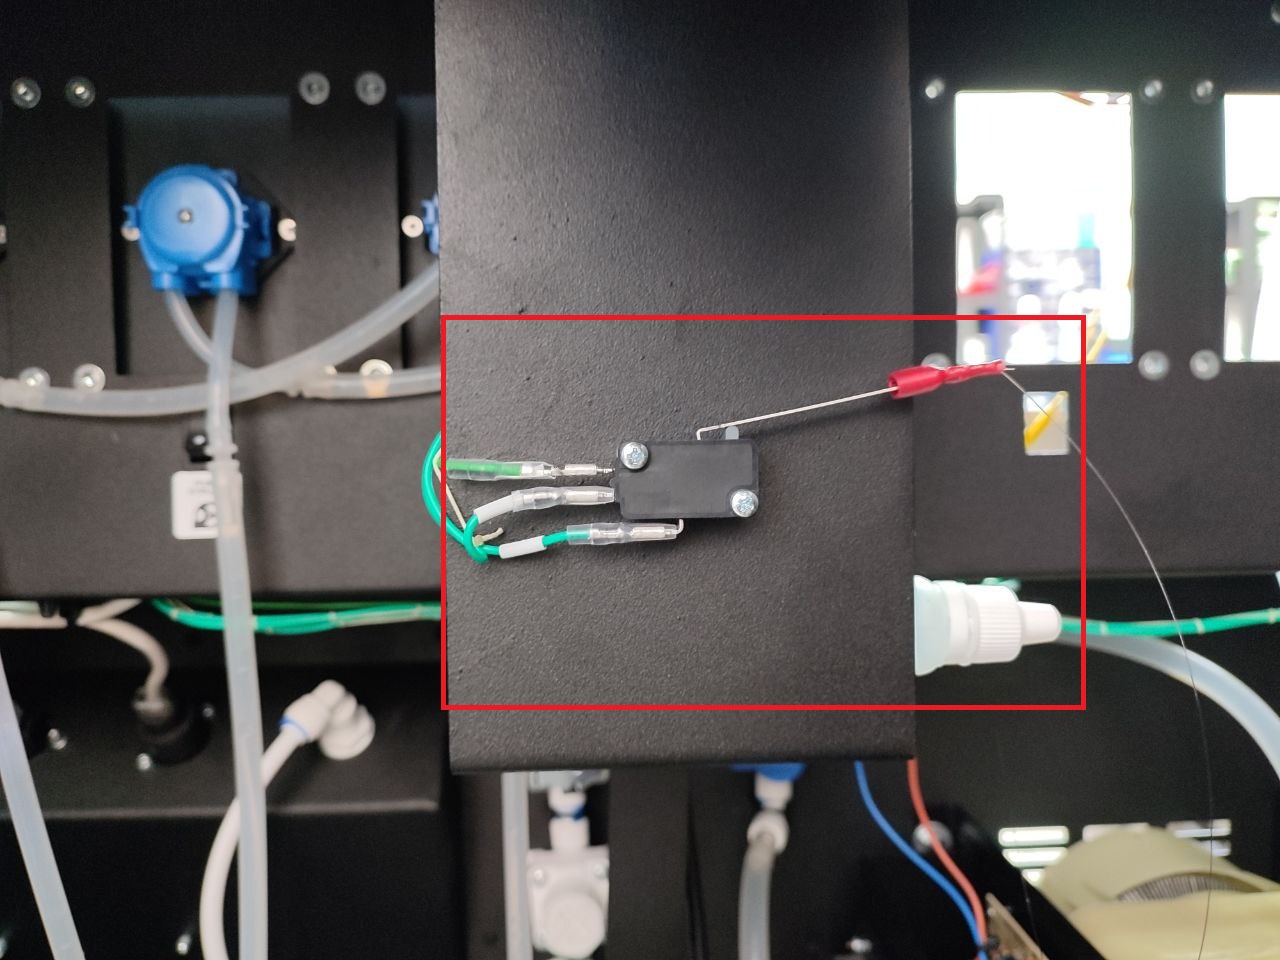
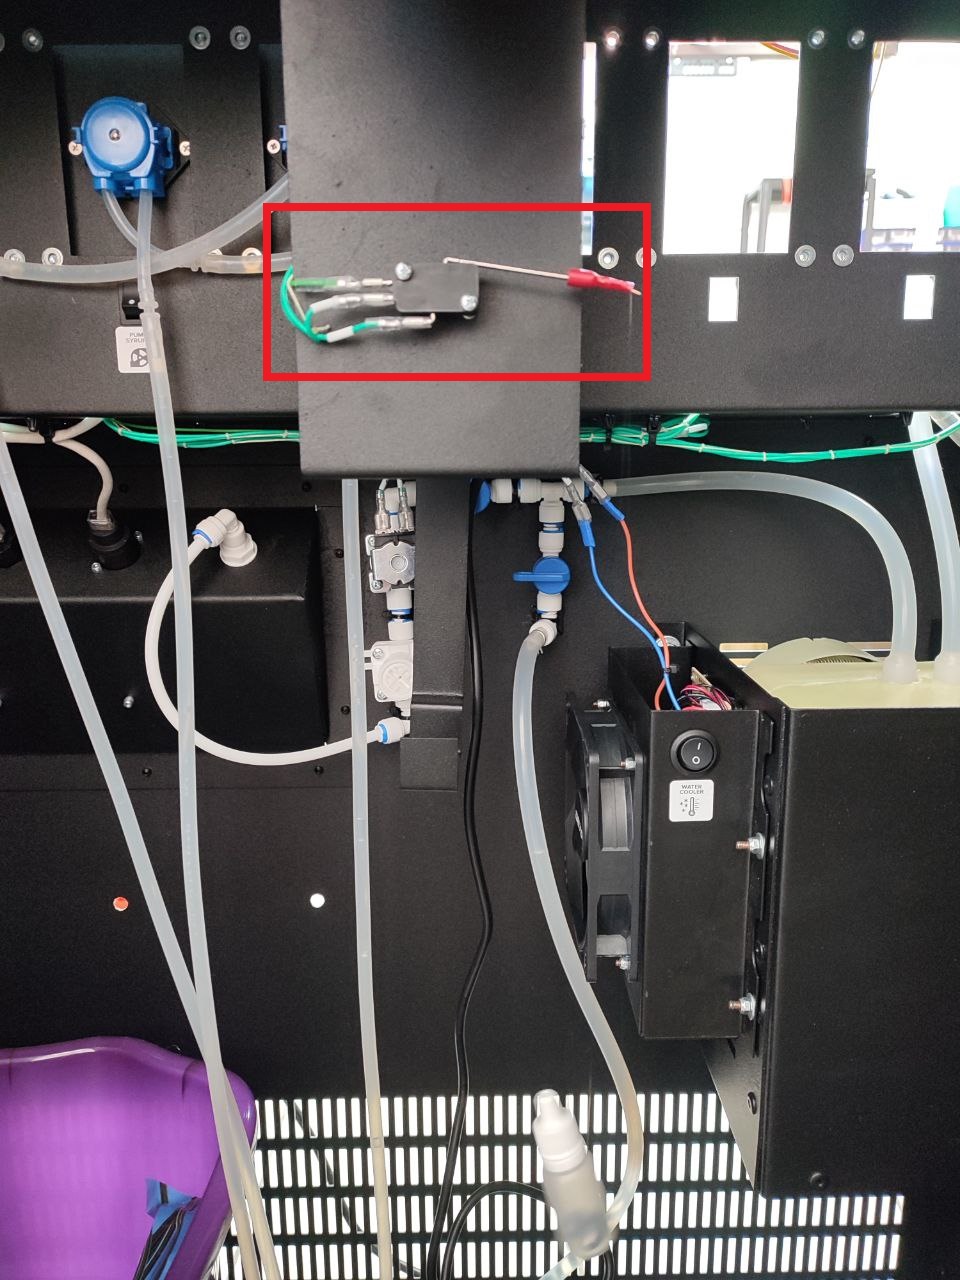
- Unwind the fishing line with the waste sensor float. The float should hang freely into the waste container, and the sensor should be in the lower position.
- Start the machine. After power is applied, the pump will turn on for 1-2 seconds. After the software loads, the message “Error 1 No Water” will appear on the screen.
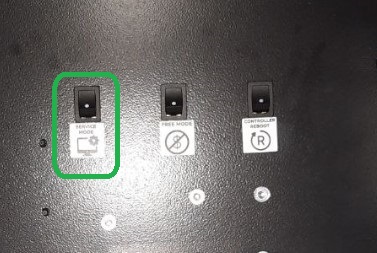
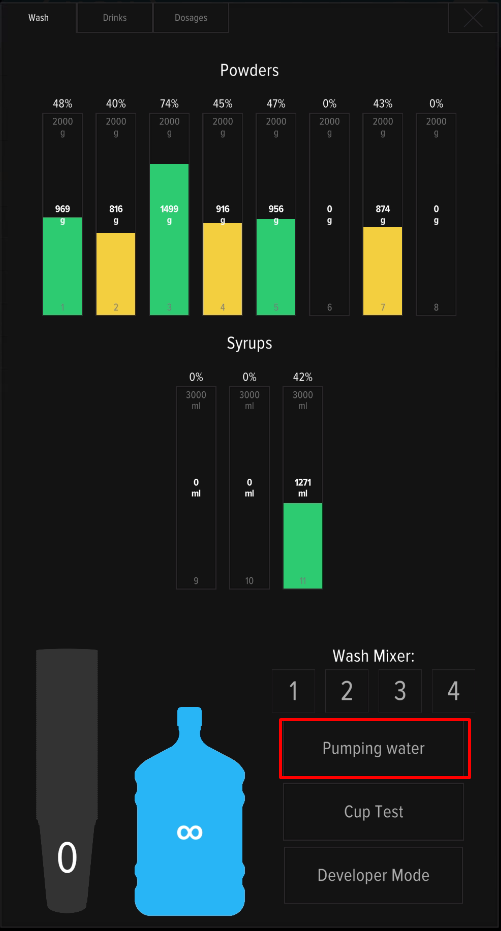
- Press the SERVICE MODE and press the “Water pumping” button on the machine’s screen.
- The machine will begin filling the system. Once the system is filled, water will begin flowing through mixer #1 and the hose into the drain tank. Wait for the process to complete.
Adjusting the water level
- Start pumping and check the water level in the mixer funnel (refer to the picture below):

- If the water level is too low or too high, the pump voltage needs to be adjusted. A small “-” screwdriver is required for this adjustment. The adjustment is made by turning the adjustment screw on the UPS board (on the backside of machine):

- To increase the water flow, turn the screw clockwise; to decrease it, turn it counterclockwise. Check the water level in the funnel.
- Open the service menu and rinse the mixers by pressing buttons 1-4 on the screen one by one.
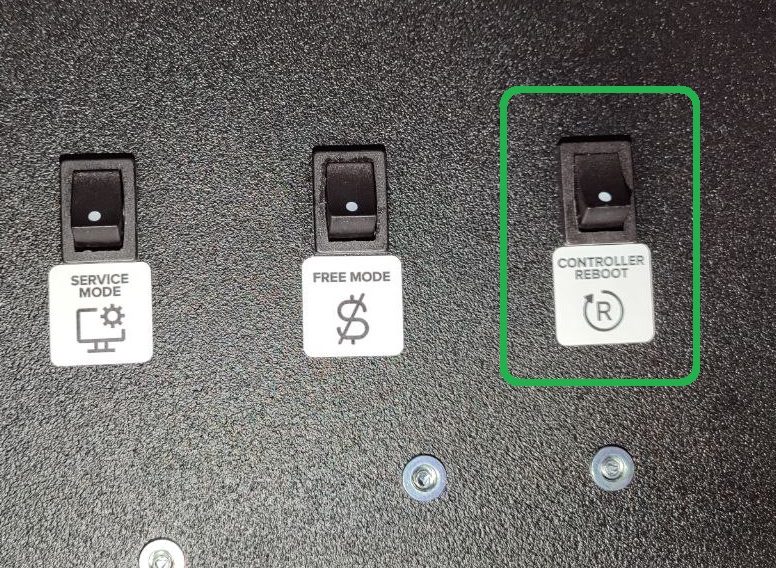
- Press CONTROLLER REBOOT. After the machine restarts, make sure Error 1 No Water is no longer displayed on the screen.
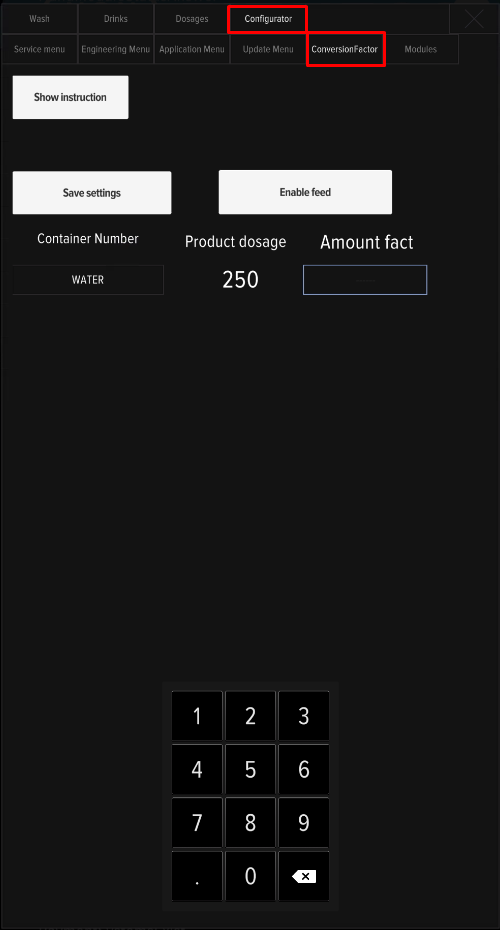
- After setting the water level, check the water output in the "ConversionFactor" tab.
The water supply connection setup is complete.
water_tank_connection_touch.1762345449.txt.gz · Last modified: 2025/11/05 15:24 by ishakeradmin