Connect a Shaker Touch to a building water line for locations with permanent water supply. This guide covers the pre-connection requirements, hookup steps, water level adjustment, output calibration, and what to do if the water valve fails to open.
Before you start
Direct connection to the water line is not recommended. Use a 3- or 5-stage water filter (Geyser, Barrier or equivalent) between the wall and the machine to protect the pump and dosing system.
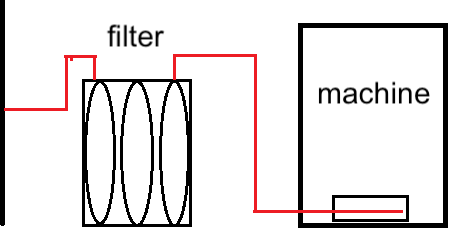
Important: do not install any water flow regulators, pressure reducers, or solenoid valves between the filter and the machine — only the supplied PVC hose.
- Use a 6 mm diameter PVC hose to connect the machine fitting.
- Verify supply pressure: 0.15–0.8 MPa (1.5–8 bar). Lower pressure won’t open the valve; higher pressure can damage internal components.
Connection procedure
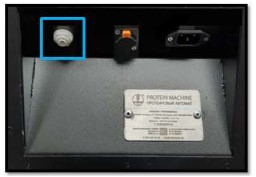
- Connect the PVC hose to the fitting on the back of the machine.
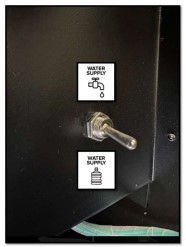
- Move the water supply switch to the up position.
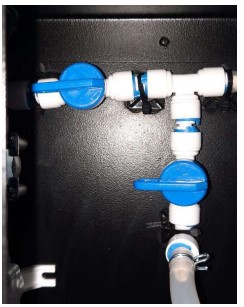
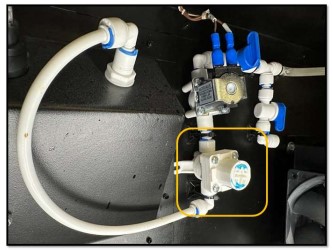
- Turn the taps to the position shown on the picture.
- Place a container for waste water under the drain.
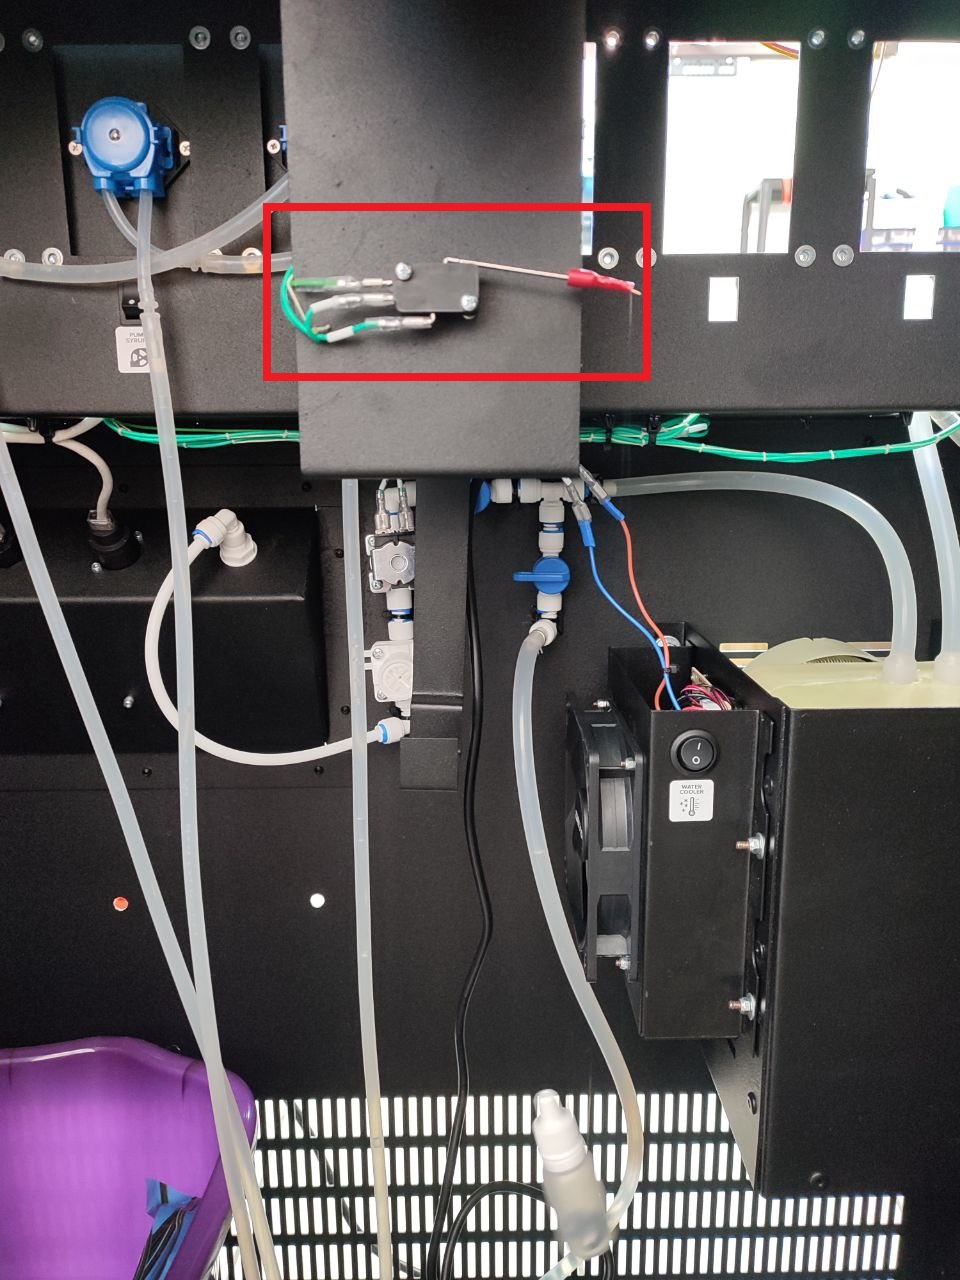
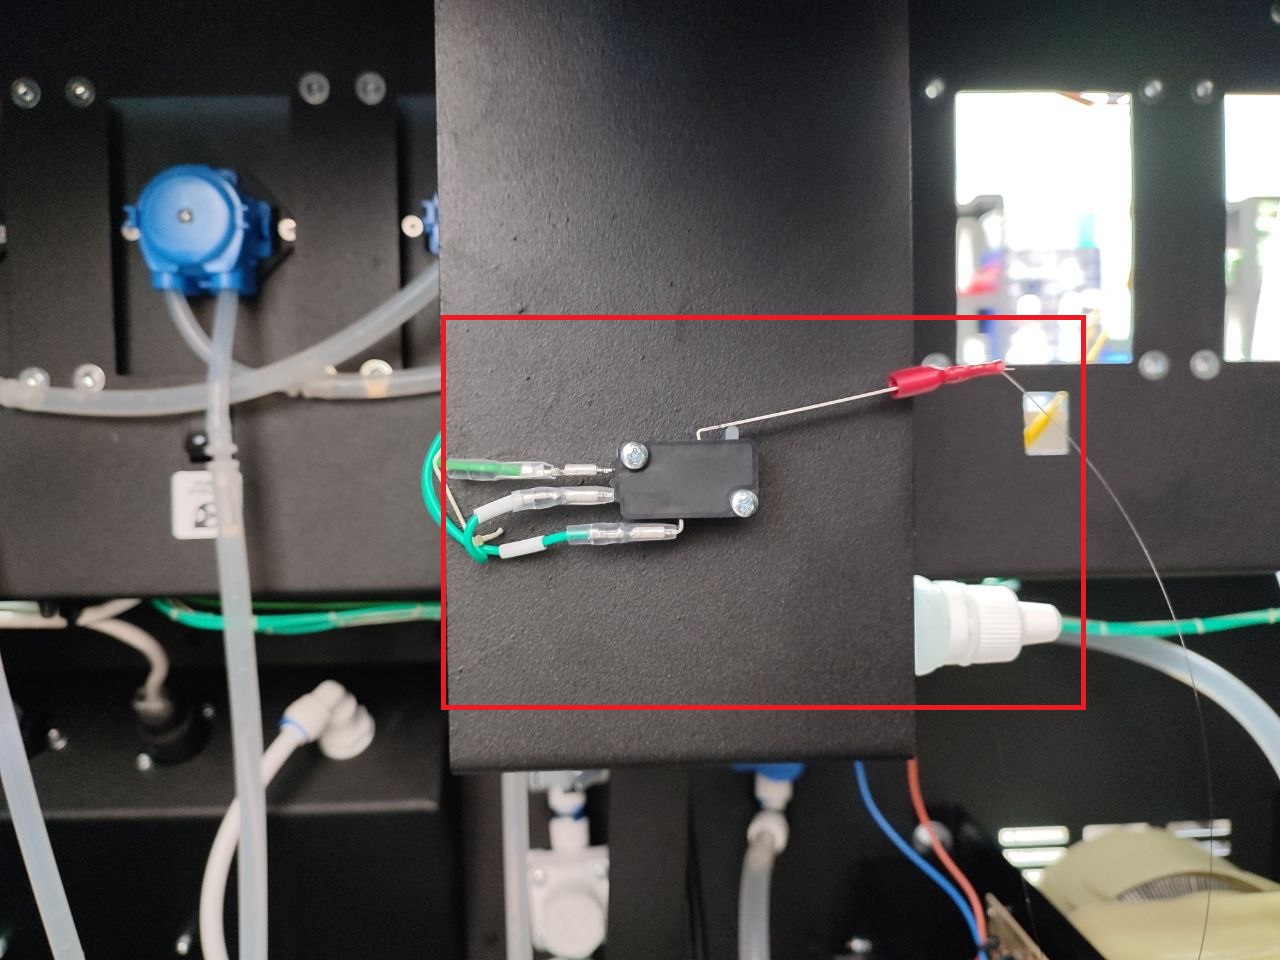
- Unwind the fishing line with the waste sensor float. The float should hang freely into the waste container, sensor in the lower position.
- Power on the machine. On first start, “Error 1 No Water” will appear on the screen — this is expected.
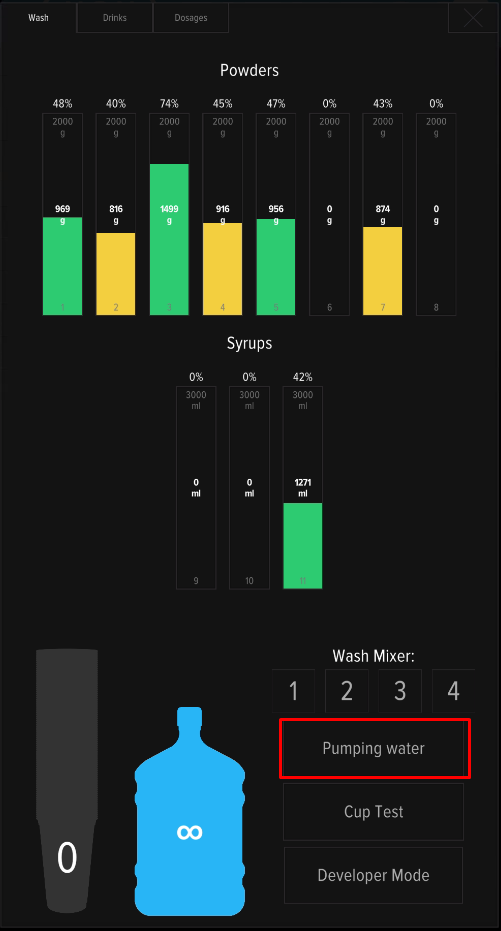
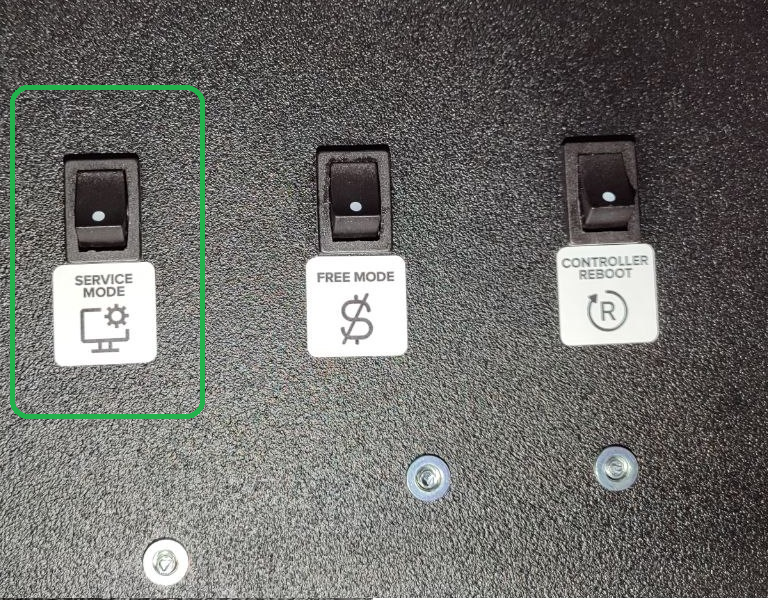
- Press SERVICE MODE, then tap “Water pumping” on the screen.
- The machine fills the hydraulic line. Once filled, water flows through mixer #1 into the drain container. Wait for the cycle to complete.
Adjusting the water level
Run a pumping cycle and check the water level in the mixer funnel against the reference image:

- If the level is too low or too high, adjust the water flow with a Phillips screwdriver on the flow regulator.
- To increase flow, turn the regulator clockwise; to decrease, counterclockwise. Re-check the funnel level.
- Open the service menu and rinse mixers 1–4 by tapping the corresponding buttons on the screen.
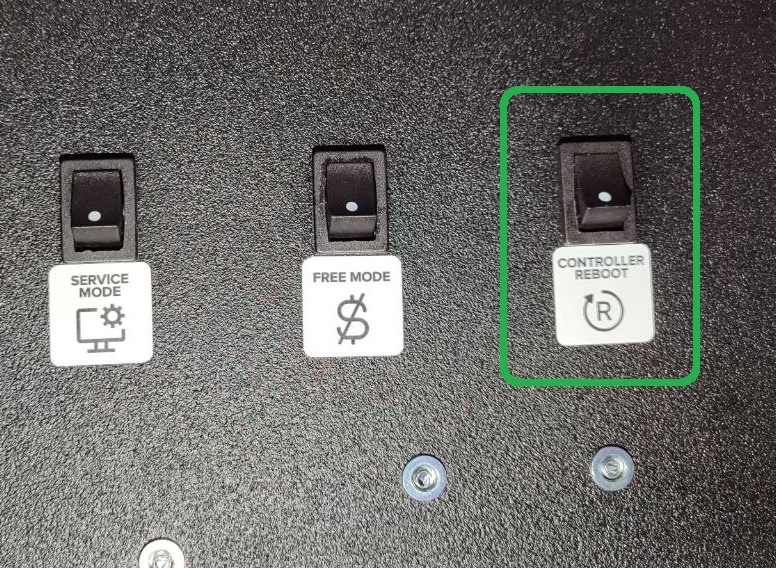
- Press CONTROLLER REBOOT. After restart, confirm that “Error 1 No Water” no longer appears.
Water output verification
After the level is correct, verify water output in the service menu’s “Calibration value” tab. Without this step, drink dosing can be off by 10–20%, directly affecting how strong each shake comes out.
The water supply connection setup is complete.
Troubleshooting — water valve doesn’t open
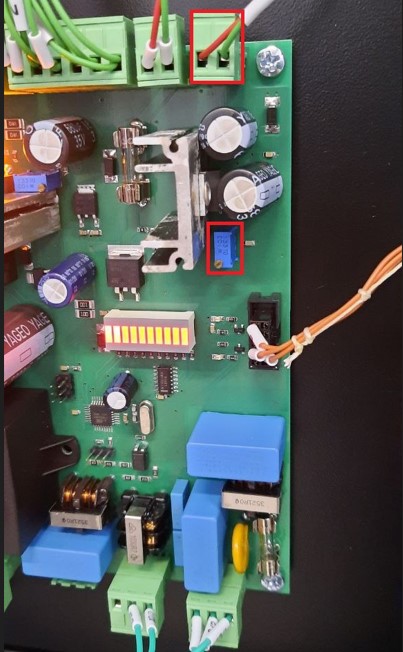
If the machine shows Error 1 and water doesn’t pump even after restart, the supply pressure may be too high — the solenoid valve cannot open against it. Lower the pressure with the flow regulator. If the issue persists, increase the voltage on the transistor of the UPS board by turning it clockwise.