This is an old revision of the document!
Table of Contents
MILKSHAKER
Milk drink vending machine

Electricity supply
The machine is designed to operate from a power grid with a voltage of 110 +/-10V.
Power consumption at peak (during the process of preparing a drink, with the standard cooler turned on, average value) - up to 210 W/h.
Total power consumption per month (with the standard cooler turned on, average value) - 32 kW.
For stable operation of the machine, it is recommended to install a line-interactive UPS with the following characteristics: 450 VA, 240 W (or not lower than those specified).
Water supply
Two water supply configurations are available:
 Central water supply (external source).
 Water tank (internal source).
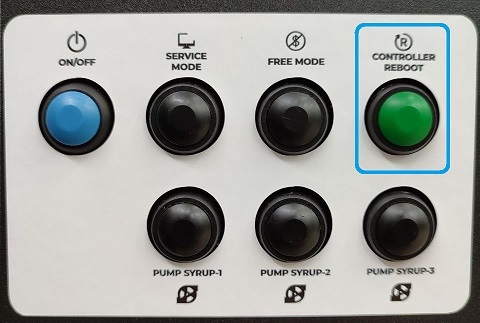
Control Panel
Use it for machine control and setting

- TURN ON (or ON/OFF) – turning off and starting the machine’s computer.
- SERVICE MODE - settings menu.
- FREE MODE – free drink mode.
- CONTROLLER REBOOT - reboot the machine.
- PUMP SYRUP - pumping of syrup pumps.
Turn on, turn off and reboot
Turning on
Turn the main power switch ON/OFF at the backside of the machine to the “I” position.
 After switching, the machine will begin the initialization. If after turning on the power switch the screen starts flashing different colors instead of loading the system, press the TURN ON button on the machine door.
Reboot
Restarting the machine is necessary to reset errors, as well as to save some settings. Two methods are used:
- Pressing the service button CONTROLLER REBOOT.
- Pressing button No. 5 on the machine controller board (backside of machine).
 .
.
To reboot the computer, press the TURN ON button on the machine door. Press the “Restart” button on the screen.
Shutdown
Turning off the machine without first turning off the computer may result in data corruption and unstable operation of the machine.
- Press TURN ON. Wait until the computer turns off (the image on the screen will disappear)
- Turn off the main power switch by switching it to the “0” position.
Machine operating modes
Payment mode
Works by default. Enabled after reboot with the CONTROLLER REBOOT.
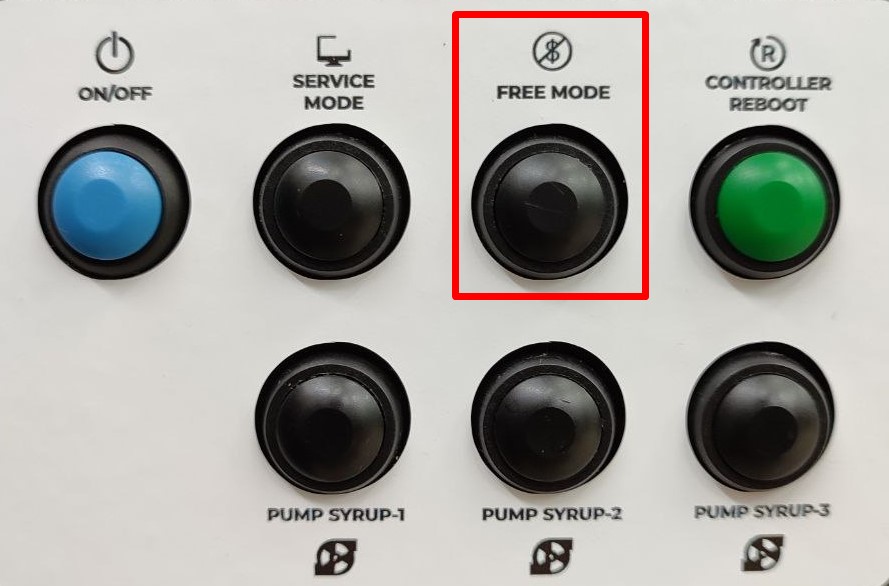
Free mode
Press the FREE MODE. Works for 15 minutes, then switches to payment mode. Turns off after rebooting with the CONTROLLER REBOOT, or when pressing the SERVICE MODE.
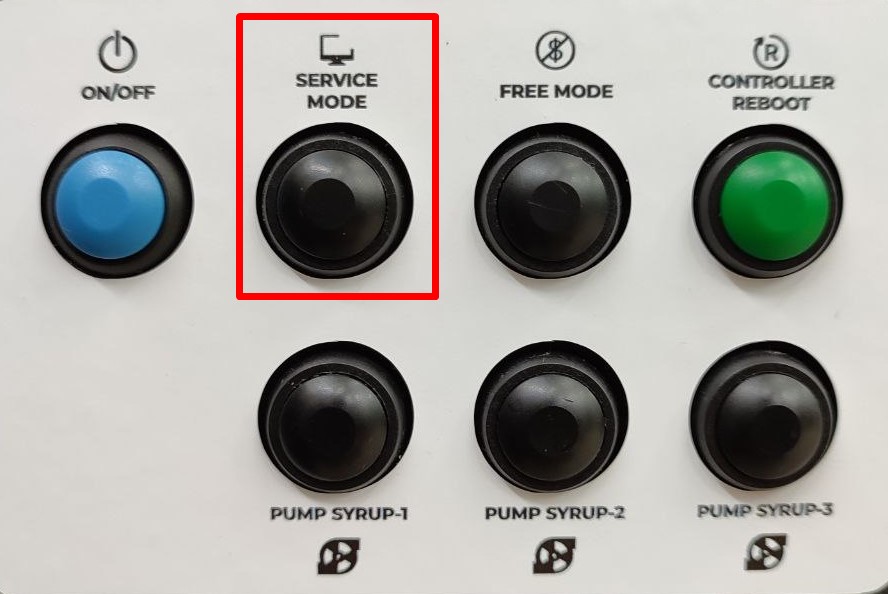
Service mode
Press the SERVICE MODE. This is access to the machine settings menu.
Payment devices
Before installing payment devices, make sure that they work in MDB protocols. The connector is located on the inside of the door.

To synchronize the terminal and the machine, it is necessary to configure the terminal with the following settings:
- MDB protocol level = 3;
- Always Idle option (not pseudo, not emulation) = on;
- Ignore machine prices = off;
- Payment waiting time = 30 sec;
- Waiting time for product delivery before automatic return = 180 sec;
- Settings for starting, maximum credit, multiplier - optional, according to the currency used.
Powders loading
- Turn the container product feed chute to the upper position;
- Lift the front part of the container, remove it from the connecting unit of the auger and the auger drive motor;
- Pull the container towards you, remove it from the installation site, open the container cap; load the powder to the top level, check thetightening of the nuts.
- Close the container cap and install the container.
- Open the service menu, set the values for the remaining products according to the filling of the container.

Setting up the tastes, setting prices and dosages of drinks
Assortment setting
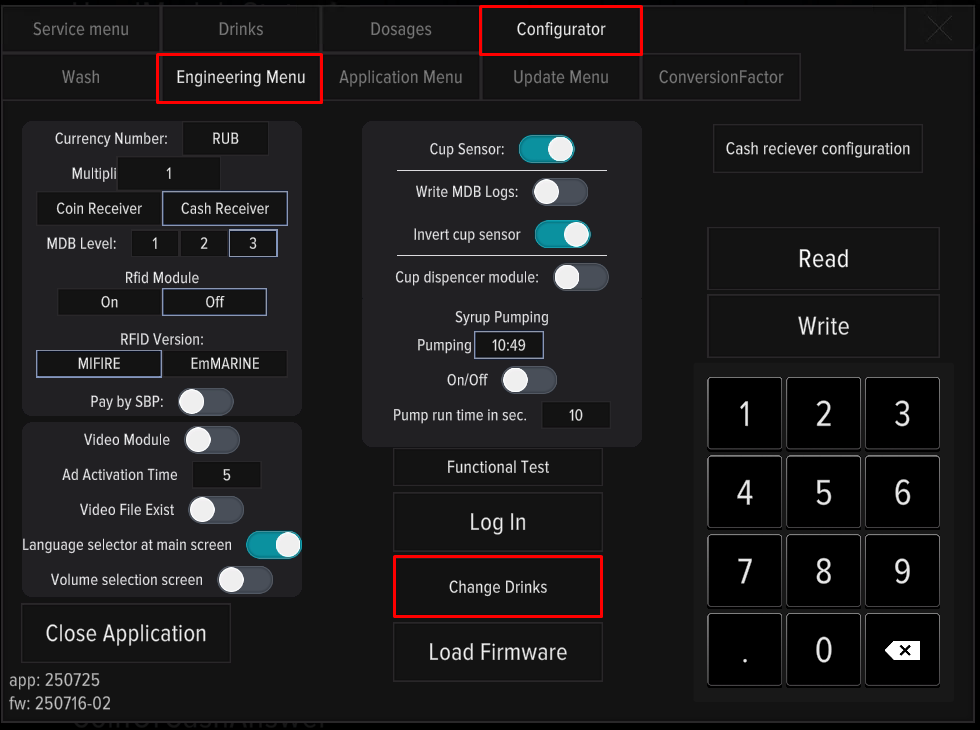
- Press SERVICE MODE;
- Click the “Developer mode” button;
- Go to the “Configurator” tab;
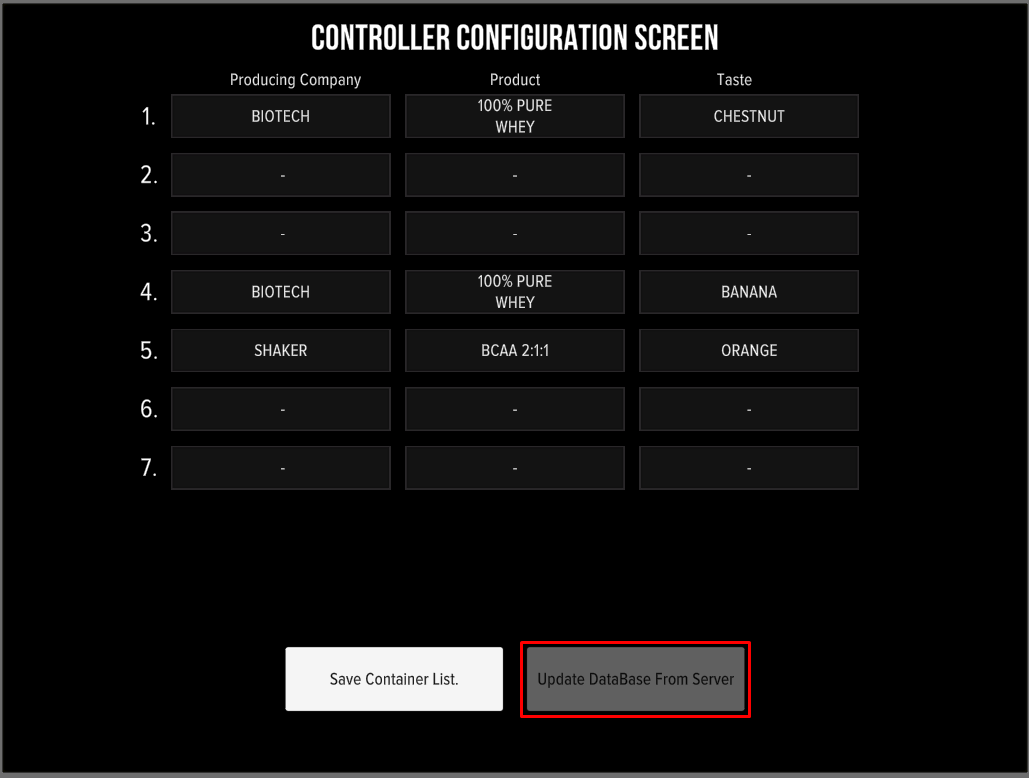
- Click on "Change drinks". If the required products are missing, click "Update database from server" (requires connection to telemetry);
The containers inside the machine are counted from left to right and are numbered 1-4. See how to change assortment by service mode below:
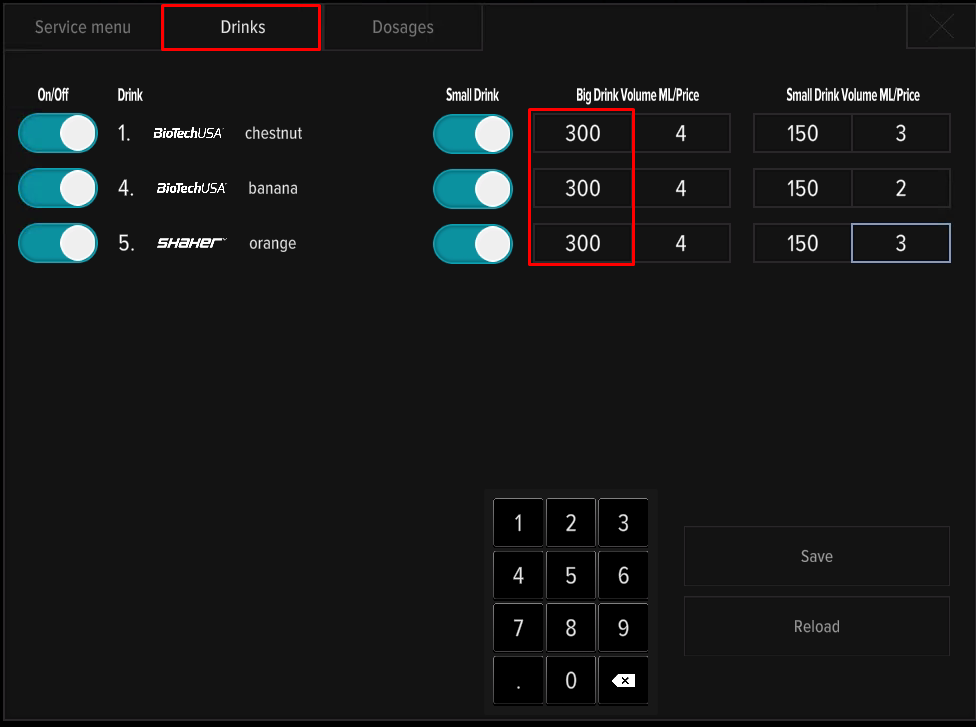
Setting up prices and dosages
Dosages recommendations: Use a powder to water ratio of 1:5. Brew your drink, adjusting the water and powder dosages as needed to achieve the best taste.
- Press SERVICE MODE;
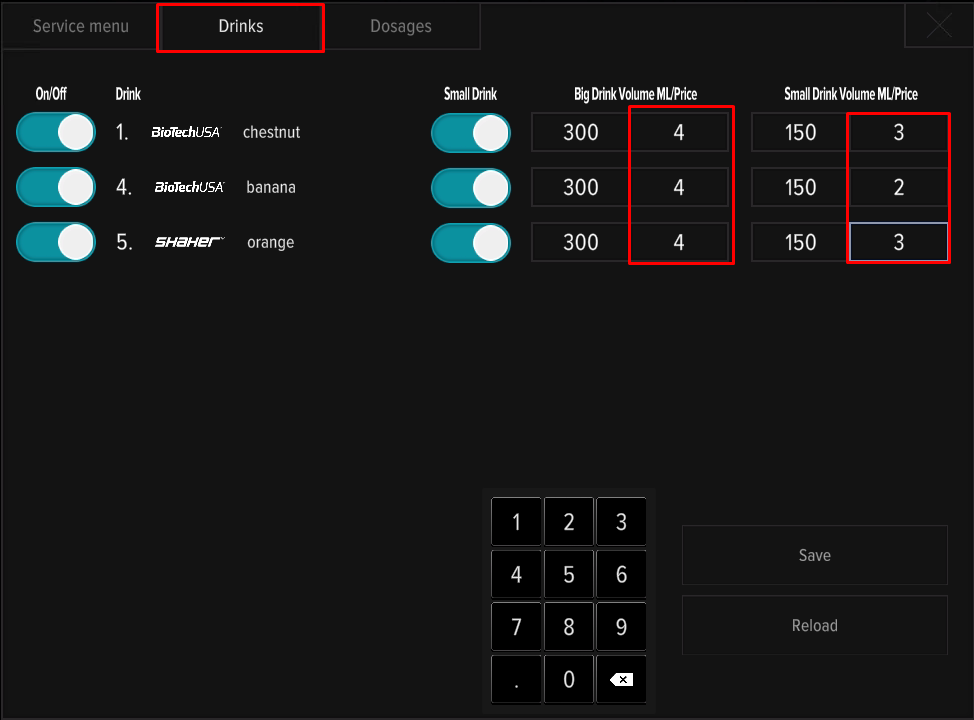
- Go to the "Drinks" tab to set prices;
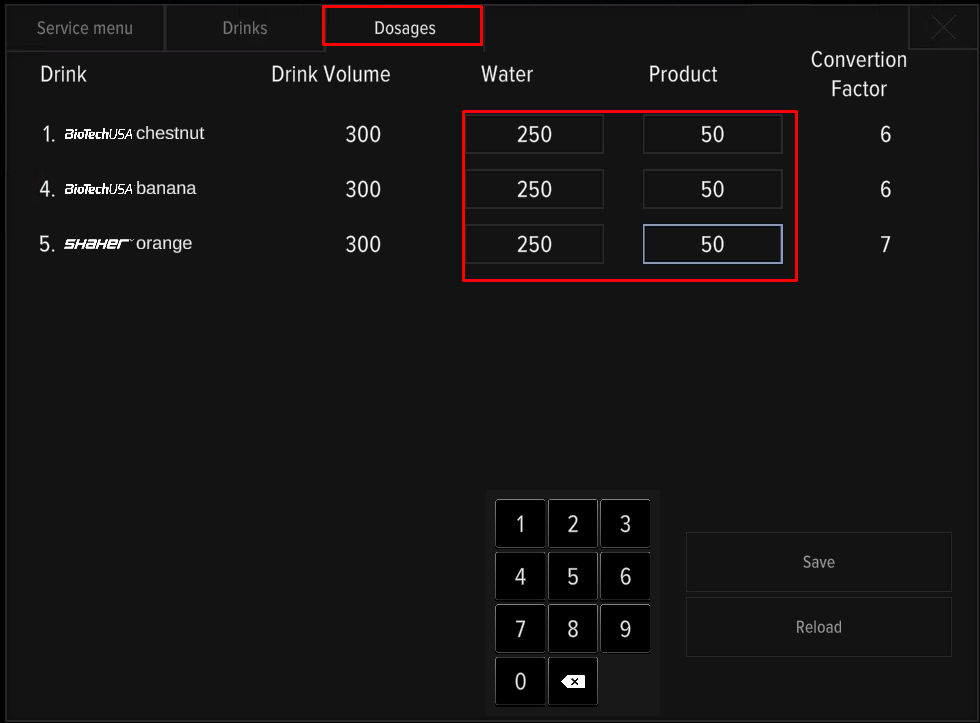
- Go to the "Dosages" tab to change the dosages;
- Click the “Save” button.
- After changing the dosages, go to the “Drinks” tab and change the actual volume of the drink.
Minimum dosage of water per dosage of powder:
- For 20 g of powder - 120 ml of water;
- For 30 g of powder - 150 ml of water;
- For 40 g of powder - 180 ml of water;
- For 50 g of powder - 220 ml of water;
- For 60 g of powder - 250 ml of water.
Calibration of product dispensing
Calibration is performed in two cases - before starting the machine into operation and when replacing the products used during operation. To perform the procedure, you will need a measuring cup and kitchen scales.
Primary calibration includes:
- Checking the water dosage;
- Checking the powder dosage;
- Checking the dosage of syrups (if available).
A re-check of the issuance is carried out in the event of a change in the products used (another brand, another product line).
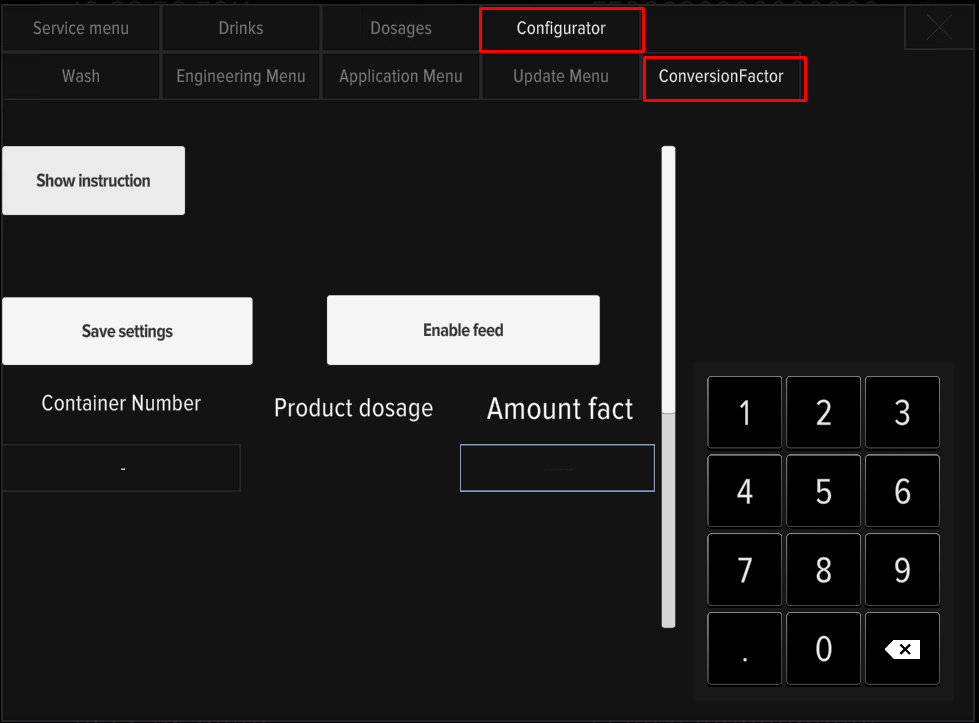
Calibration consists of dispensing the product, weighing and entering corrections on the machine display. Push SERVICE MODE, in the “Configurator” tab, open the Conversion factor menu and follow the instructions on the screen.
Connecting to the Internet
An internet connection is required for telemetry and remote connection to the machine. Three connection types are used.
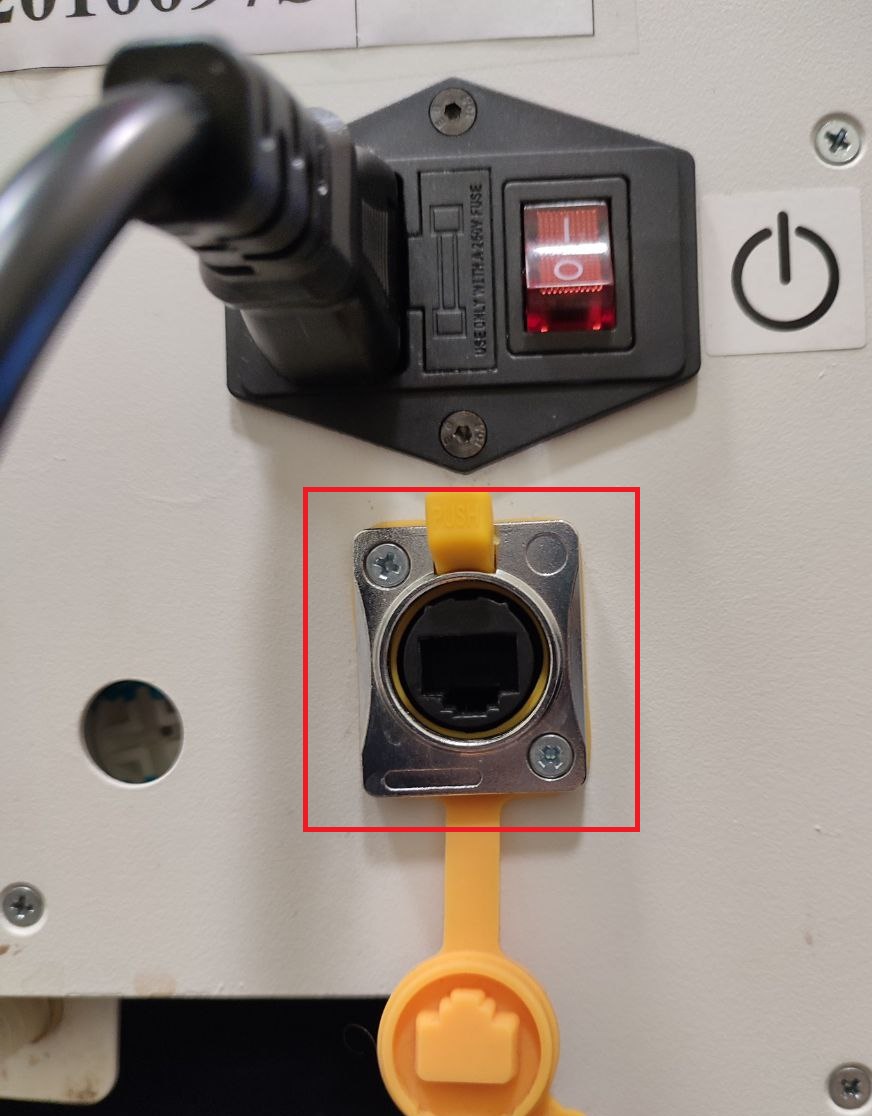
Connecting a LAN cable
Connect LAN cable to connector near the power cable. No configuration required.
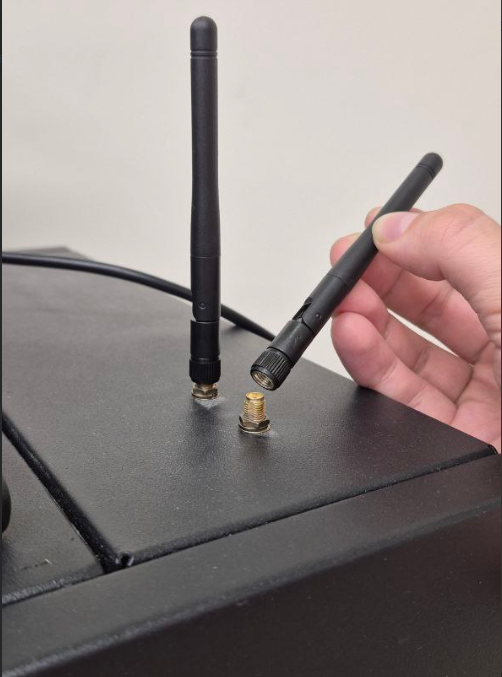
Connecting to WiFi networks
For stable operation of the module, install the standard receiver antennas into the connectors on the top of the machine. Check video about WiFi connecting below:
Setting up a remote connection
AnyDesk is used for remote connection to the machine. Ask technical support for credentials to connect to the machine. Remote connection requires internet access.
Errors and solutions
List of machine errors:
Question: Drinks disappear from the screen. After reboot they showed at display, but immediately disappear.
Answer: Check products remains in the service menu. When the product remains reaches low values (less than 5 dosages), the machine hides the drink from the selection.
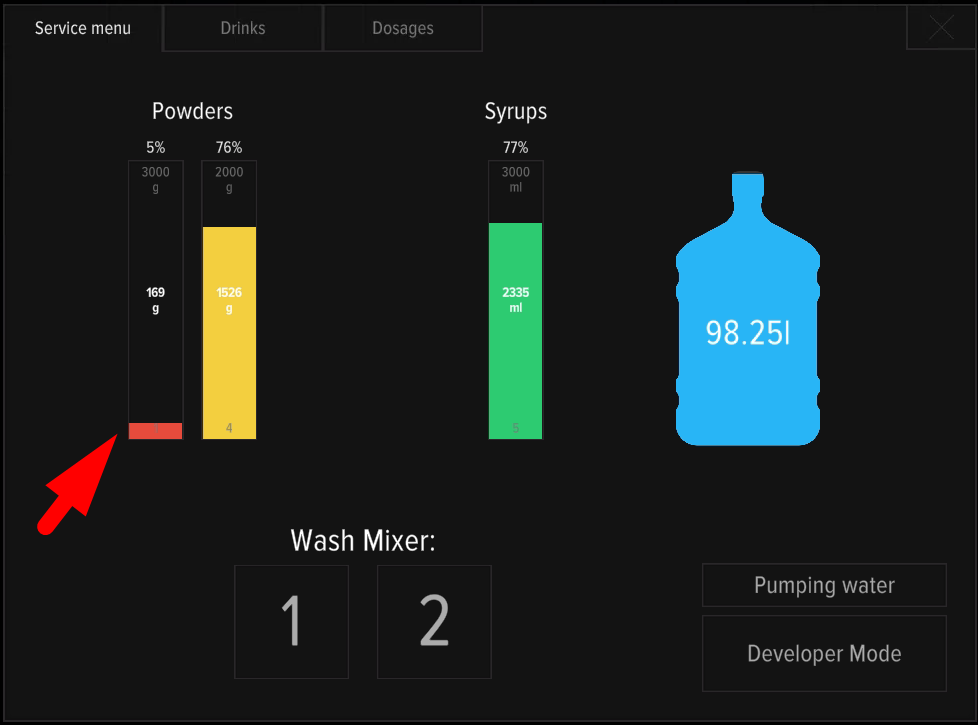
Question: The machine shows error 1 No water, water has just been replenished.
Answer: After refilling/replacing the water tank, it is necessary to bleed the system to remove air. Use mixer washing buttons 1 and 2 in the service menu. Press CONTROLLER REBOOT. After servicing the machine, it is recommended to do a test brew to check stable operation. A more detailed description of the error is available in the manual Error 1 No Water.
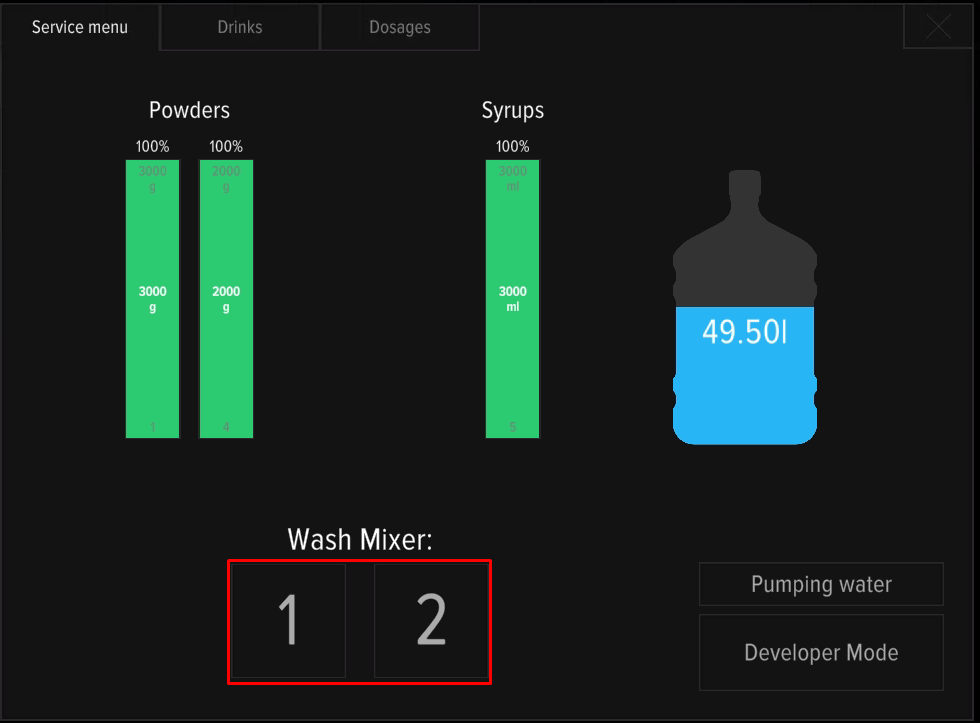
Question: Mixers often get clogged with powder. Why does this happen?
Answer: There may be several reasons:
- Incorrect assembly of mixer units - read the assembly manual and watch the service training video;
- Poor cleaning of mixers, filling hoses and fittings;
- Incorrectly selected dosages of the drink - follow the recommendations for adjusting the dosages;
- Insufficient water pressure in the system (see Error 1 No Water and setup instructions);
- Poor quality of powder - loss of flowability (lumps form), dampness due to improper storage. The presence of solid particles, crumbs, pieces of dry fruit in powders can also lead to frequent blockages even with regular maintenance.
Question: After turning on, the screen flashes different colors, but there is no image.
Answer: Press the TURN ON service button.
Question: The machine reboots immediately after cooking starts. What should I do?
Answer: Disassemble and wash the mixer units, check the correct assembly of the parts.