water_tank_connection_sms
Connection to a water tank using a pump
Rules and order of connection:
- Remove the pump and hose from the shipping packaging:

- Connect the cable connector and hose to the connectors on the back of the machine:

- Put the pump to the bottom of the water tank:

- Move the water supply switch to the down position:

- Turn the taps as shown in the picture below:

- Start the machine, wait for the software to load. When you first start it, the message Error 1 No Water will appear on the screen.
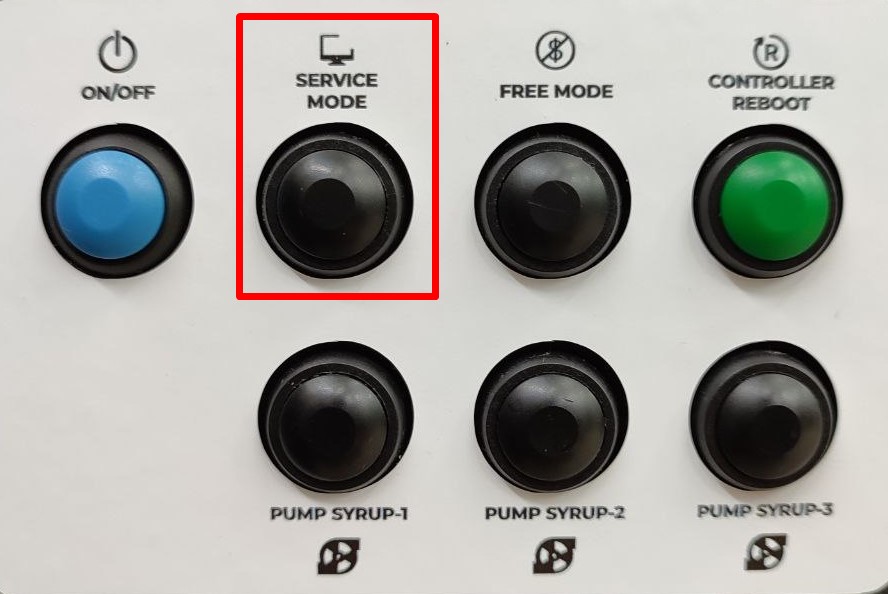
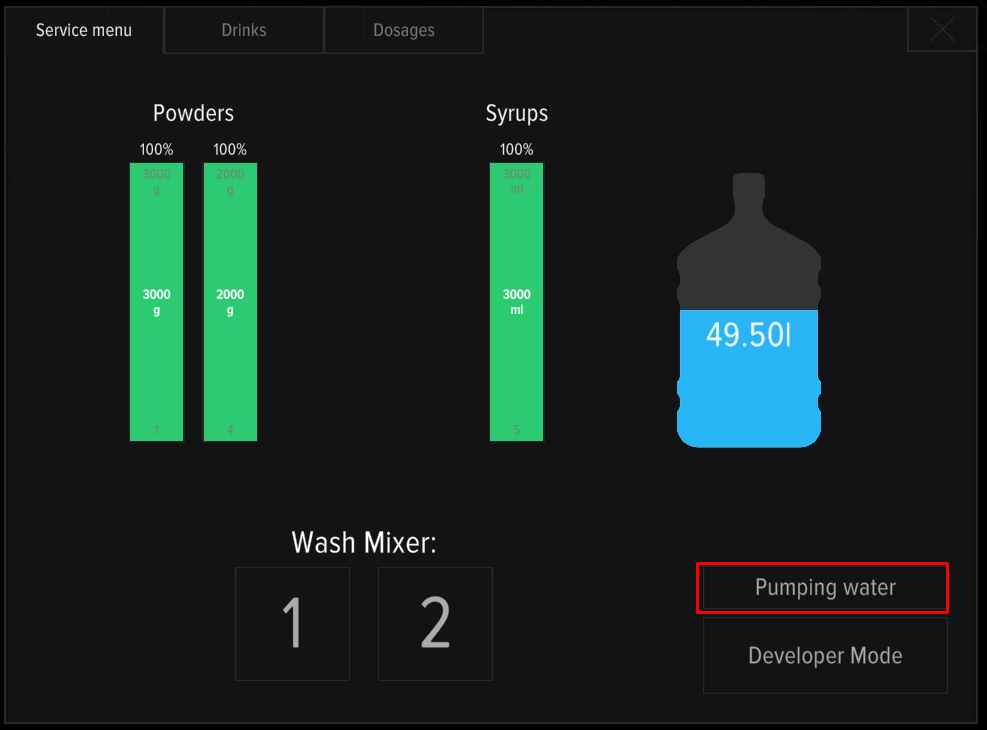
- Press SERVICE MODE button, place the cup in the dispensing window, press Pumping water on the machine screen.
- The machine will start the process of filling the system. Water will start flowing through mixer #1 and the hose into the dispensing window. Wait until the process is complete. Repeat pumping until the water flow is stable and the air bubbles disappear.
Setting the water level
- Start pumping and check the water level in the mixer funnel (see the picture below). The optimal level is indicated by a green stripe, red - excessive or insufficient level:
 .
. - In case of insufficient or excessive water level, it is necessary to adjust the pump voltage. For adjustment, you will need a small “minus” screwdriver. Adjustment is carried out by turning the right adjustment screw on the back panel of the machine during water pumping.

- To increase the water flow, turn the right screw clockwise, to decrease - counterclockwise. Check the water level in the funnel. If the level does not correspond to the optimal indicators - repeat the process.
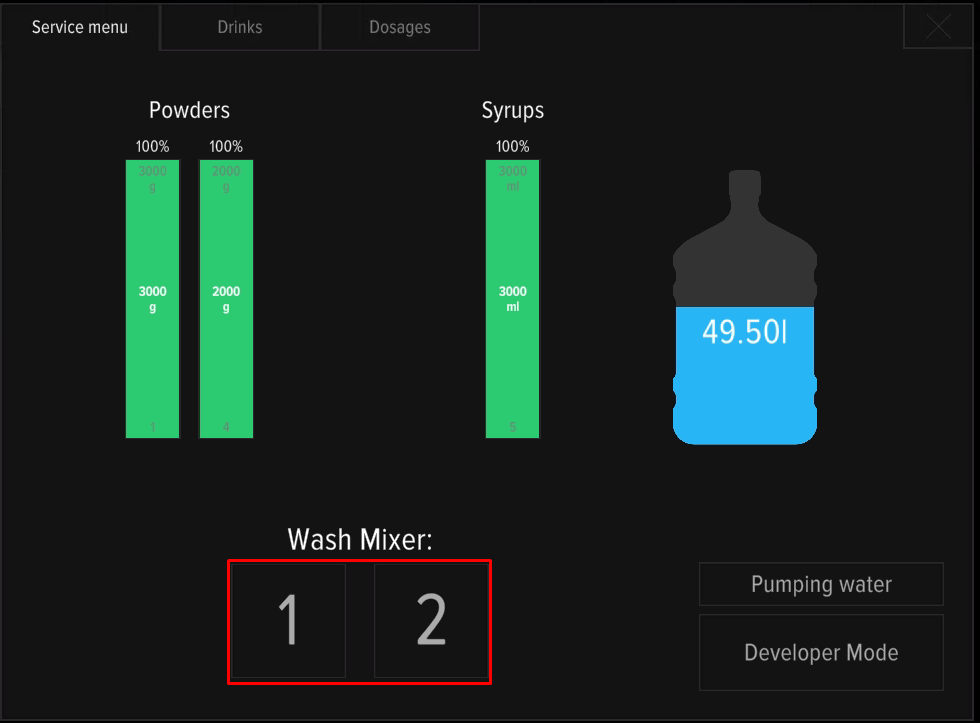
- Open the service menu and wash the mixers by pressing 1 and 2 on the screen one after the other.
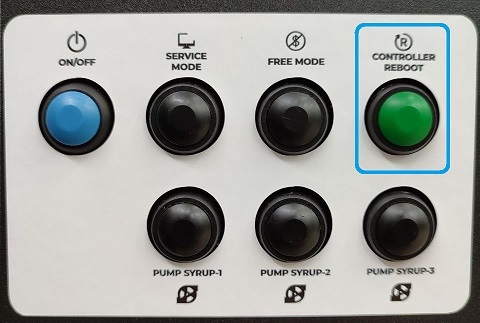
- Press the service button CONTROLLER REBOOT. After the machine reboots, make sure that Error 1 No Water is not displayed on the screen.
- After setting the water level, check the water output in the service menu “Conversion factor”.
The water supply connection setup is complete.
water_tank_connection_sms.txt · Last modified: 2025/11/05 17:18 by ishakeradmin