Connecting to a water tank (Touch 2)
Connection setup procedure:
- Place a container with water inside the machine;
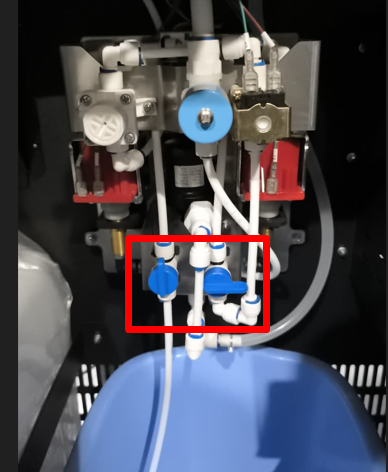
- Lower the water intake hose into the container;
- Turn the hydraulic line valves to supply water from the container;
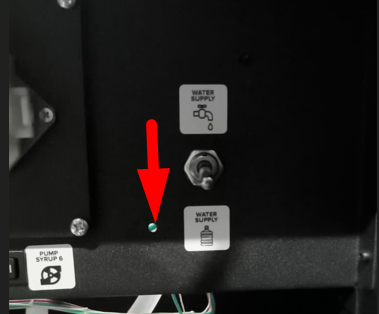
- Set the water supply switch to the pump operation position;
- Turn on the machine's main power switch and wait for the software to load. After startup, the pumps will turn on for 2-3 seconds.
- Press the SERVICE MODE button, then tap “Water Pumping” on the screen. Continue pumping until the hydraulic line is full and water flows from the hoses
- Press buttons 1-4 to rinse all mixers in turn until water comes out.
- Press the CONTROLLER REBOOT button or reset the machine from the screen on the Drinks tab.
- Make sure that error 1 No water is not displayed on the screen after restarting the machine.
Pump setup
If water is supplied after connecting, but error 1 “No water” persists after rebooting, check the water level in the mixer. Run a pumping cycle in the service menu and compare the flow rate with the image below:

If the water level is below the green line, increase the water flow. To do this, open the service menu and go to Configurator - Service Menu. Find the “Water PWM Setting” option.

The default value is 40%. Moving the slider to the left will decrease the pressure, while moving it to the right will increase it. To save the change, be sure to click the “Save” button. It is not recommended to increase or decrease the pressure drastically; change the value by 10% at a time, be sure to save the change, reboot the machine, and check for error 1.
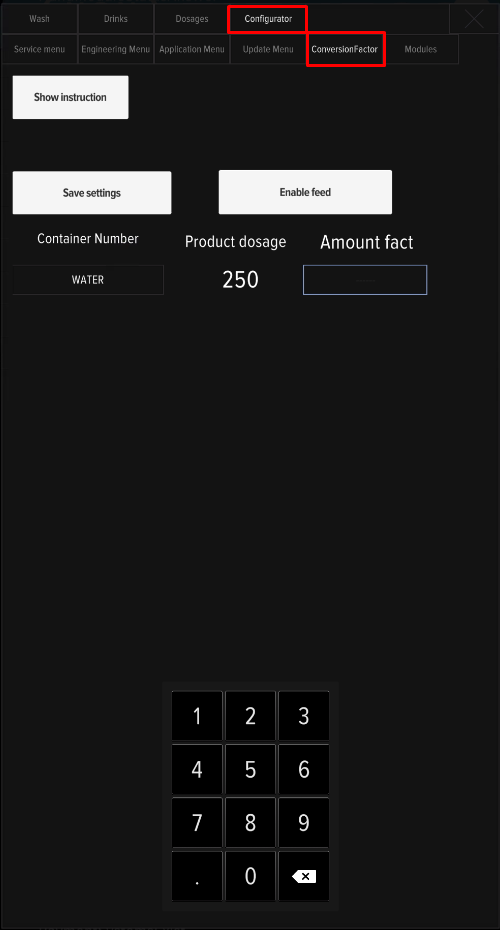
After changing the PWM setting, water calibration is required to correctly calculate drink dosages.