Promo Codes
Run discounts on your iShaker machines — by code or by printed QR — and track every redemption.
Promo codes let you offer discounts to customers. A code can be used by name (typed at the machine) or scanned as a QR. You set how many times the code can be used and when it expires; the system tracks every redemption so you can measure how each campaign performs.
This guide covers creating a code, generating a printable QR, and reviewing usage statistics.
Before you start
- An iShaker telemetry account with at least one machine registered. If your machine is not yet registered, see Authorization and control of the machine in iShaker telemetry.
- The machine must be online for new codes to reach it. Codes created while the machine is offline will activate as soon as it reconnects.
Step 1 — Open the Promo Codes section
Sign in at manage.ishakerusa.com. In the left sidebar, click Promo codes. You’ll see a list of any codes you’ve already created and a toolbar with the main actions:
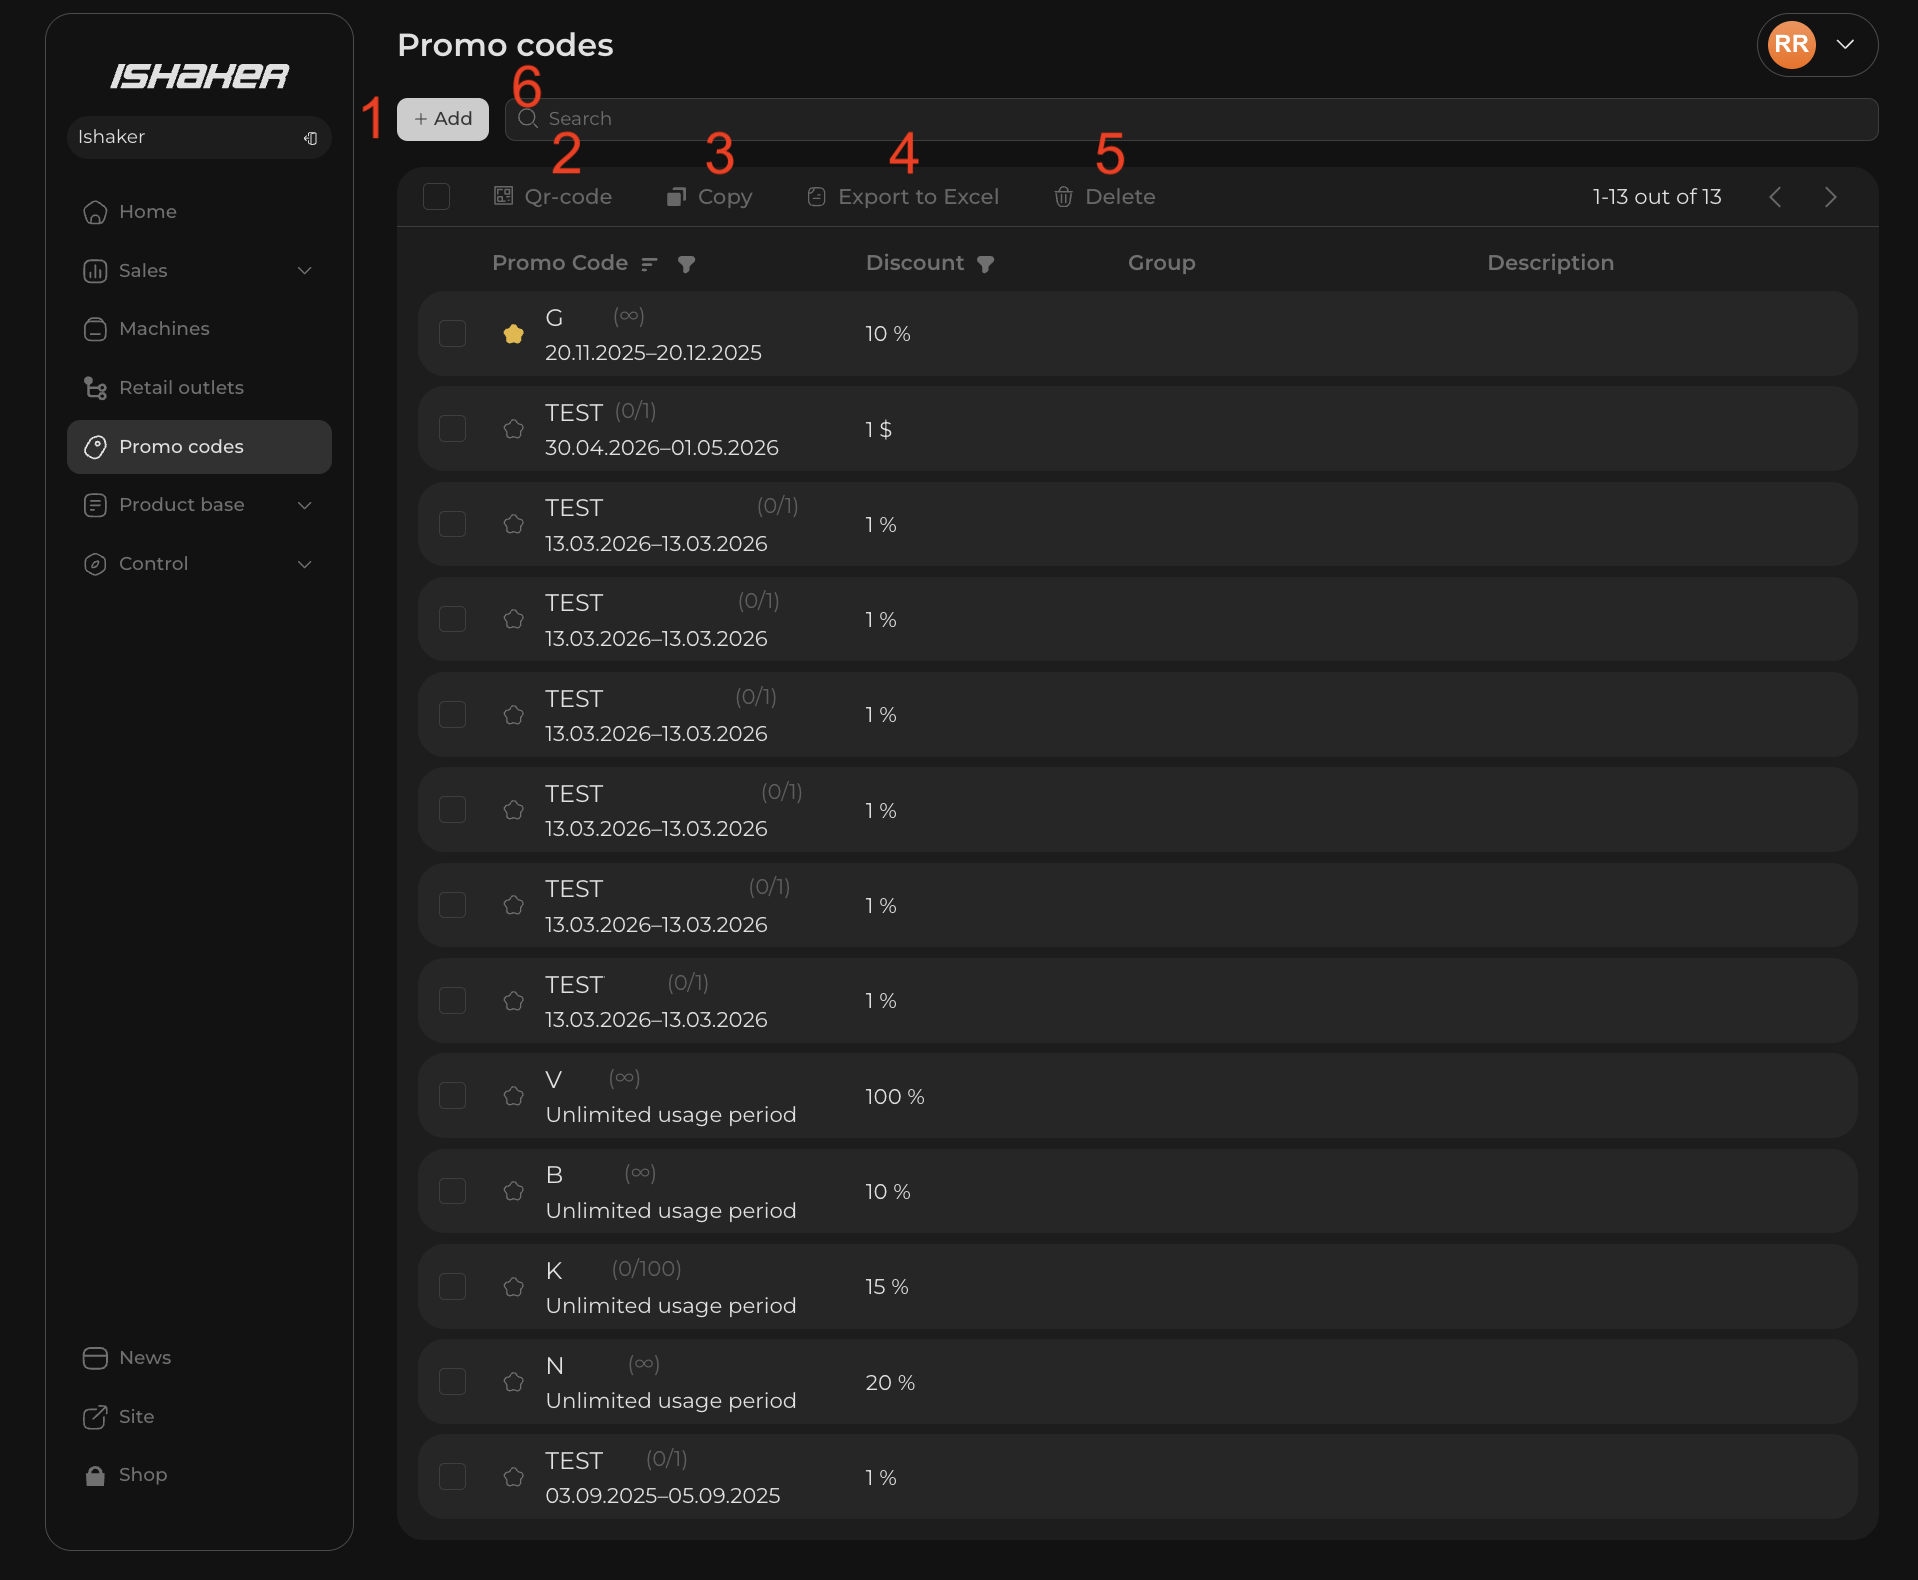
- 1. + Add — create a new promo code.
- 2. Qr-code — bulk print: get a single page with all the selected QRs. To print the QR for one code, use the QR icon on the code’s page (see below).
- 3. Copy — duplicate the selected codes as a starting point for new ones.
- 4. Export to Excel — download usage statistics for the selected codes as an Excel file.
- 5. Delete — remove the selected codes.
- 6. Search — find a specific code by name.
Note: the Qr-code, Copy, Export to Excel and Delete buttons act on selected codes only. Tick the checkboxes next to the rows you want, then click the toolbar button. Without a selection these buttons are inactive.
Step 2 — Create a code
Click + Add. The Create promo code window opens:
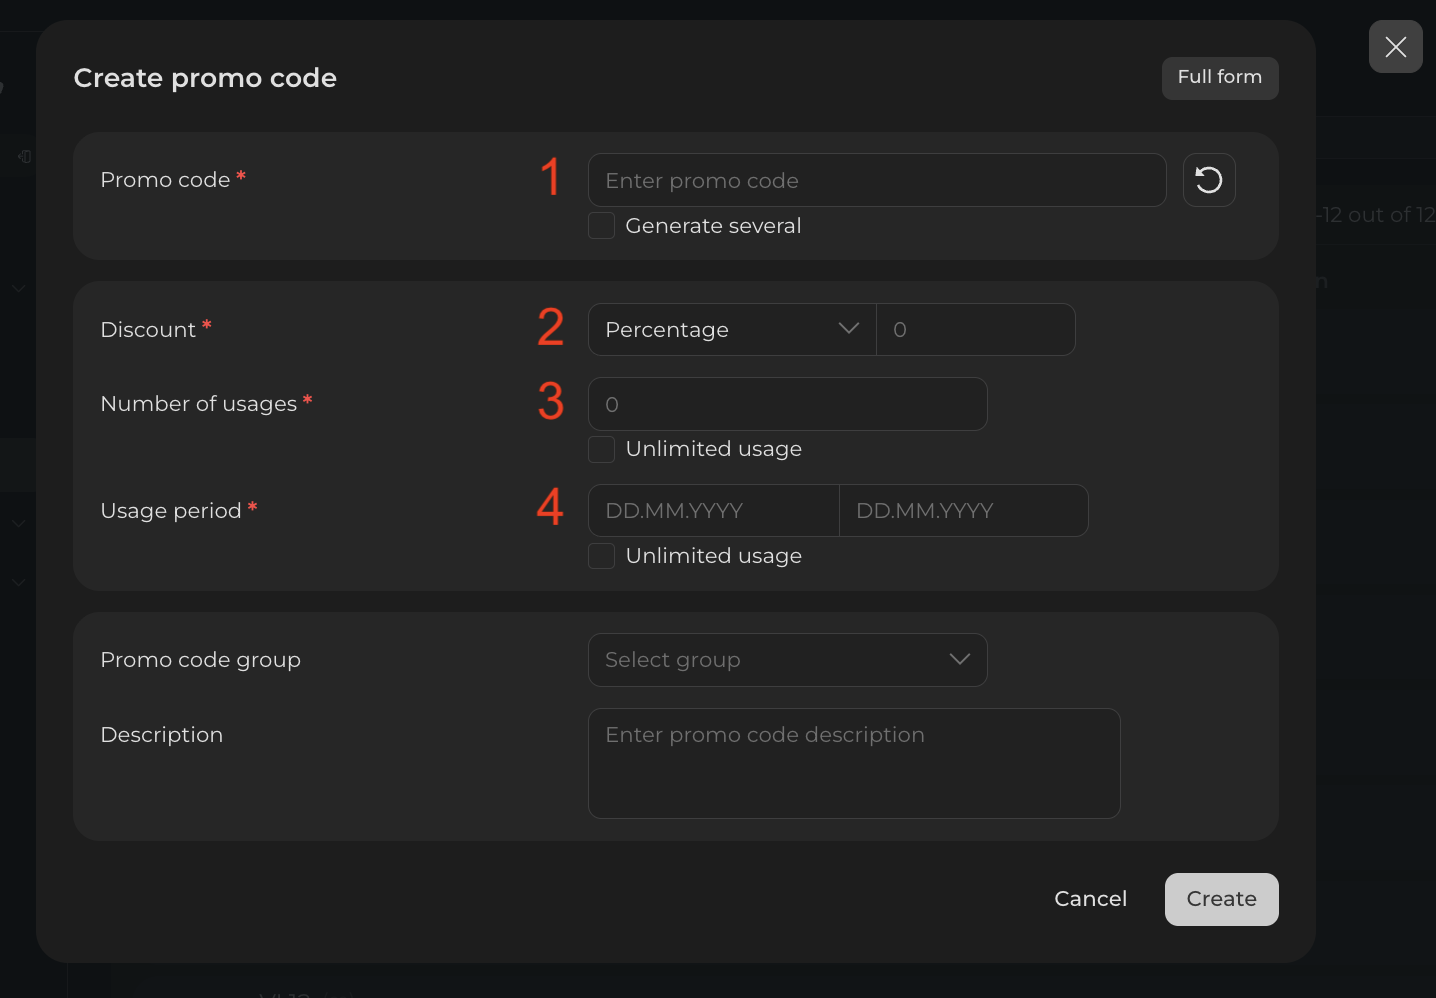
- Promo code — type the name customers will enter, for example
SUMMER20. Or click the refresh icon next to the field to auto-generate a random code. - Discount — pick a type from the dropdown and enter the value to the right:
- Percentage — a percentage off the order. Enter a number from 1 to 100 (for example,
20= 20% off). - Fixed — a fixed amount off, in the machine’s currency. Enter a number (for example,
1= $1 off the order). - Free — the entire order is free. The value field is disabled — nothing to enter. Use carefully: every redemption gives away the drink at no charge.
- Percentage — a percentage off the order. Enter a number from 1 to 100 (for example,
- Number of usages — how many times the code can be redeemed in total (optional, see Step 3).
- Usage period — start and end dates the code is valid (optional, see Step 3).
- Click Create. The new code appears in the list — it’s now active and can be redeemed at the machine.
Step 3 — Set usage limits and expiry (optional)
On the same form you can limit how many times the code can be used and for how long. Leave the fields empty and tick Unlimited usage to keep the code unrestricted — anyone can redeem it any number of times, with no expiry.
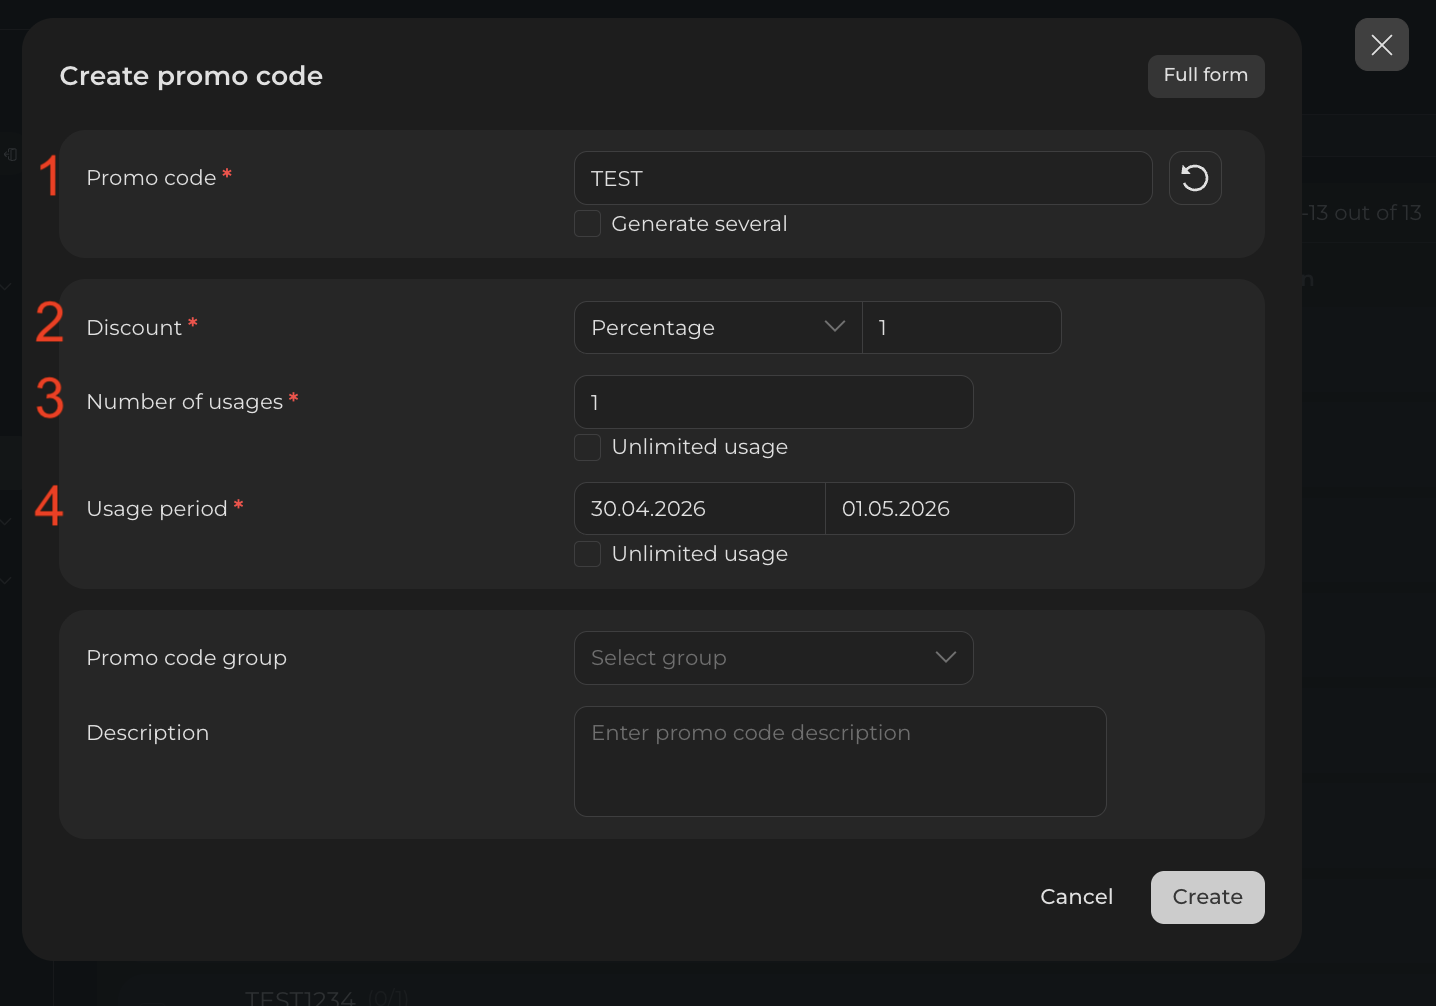
- 1. Promo code — the code’s name; the discount type is set (see Step 2).
- 2. Discount — the type and value of the discount.
- 3. Number of usages — total redemptions allowed across all customers (the screen shows
1: the code can be used only once). To leave it open, tick Unlimited usage below the field — the field becomes inactive. - 4. Usage period — start and end dates the code is valid (the screen shows
30.04.2026–01.05.2026: only valid that day). To make the code permanent, tick Unlimited usage below the field.
Use Number of usages for limited campaigns (first 50 customers, etc.) and Usage period for time-bound promotions (a specific weekend, a launch month). Each limit is independent — you can set just a usage cap without dates, just a date range without a cap, or both.
Open the code’s page and generate a QR
Click on a code in the list to open its Promo code information page with current parameters and a live counter of redemptions:
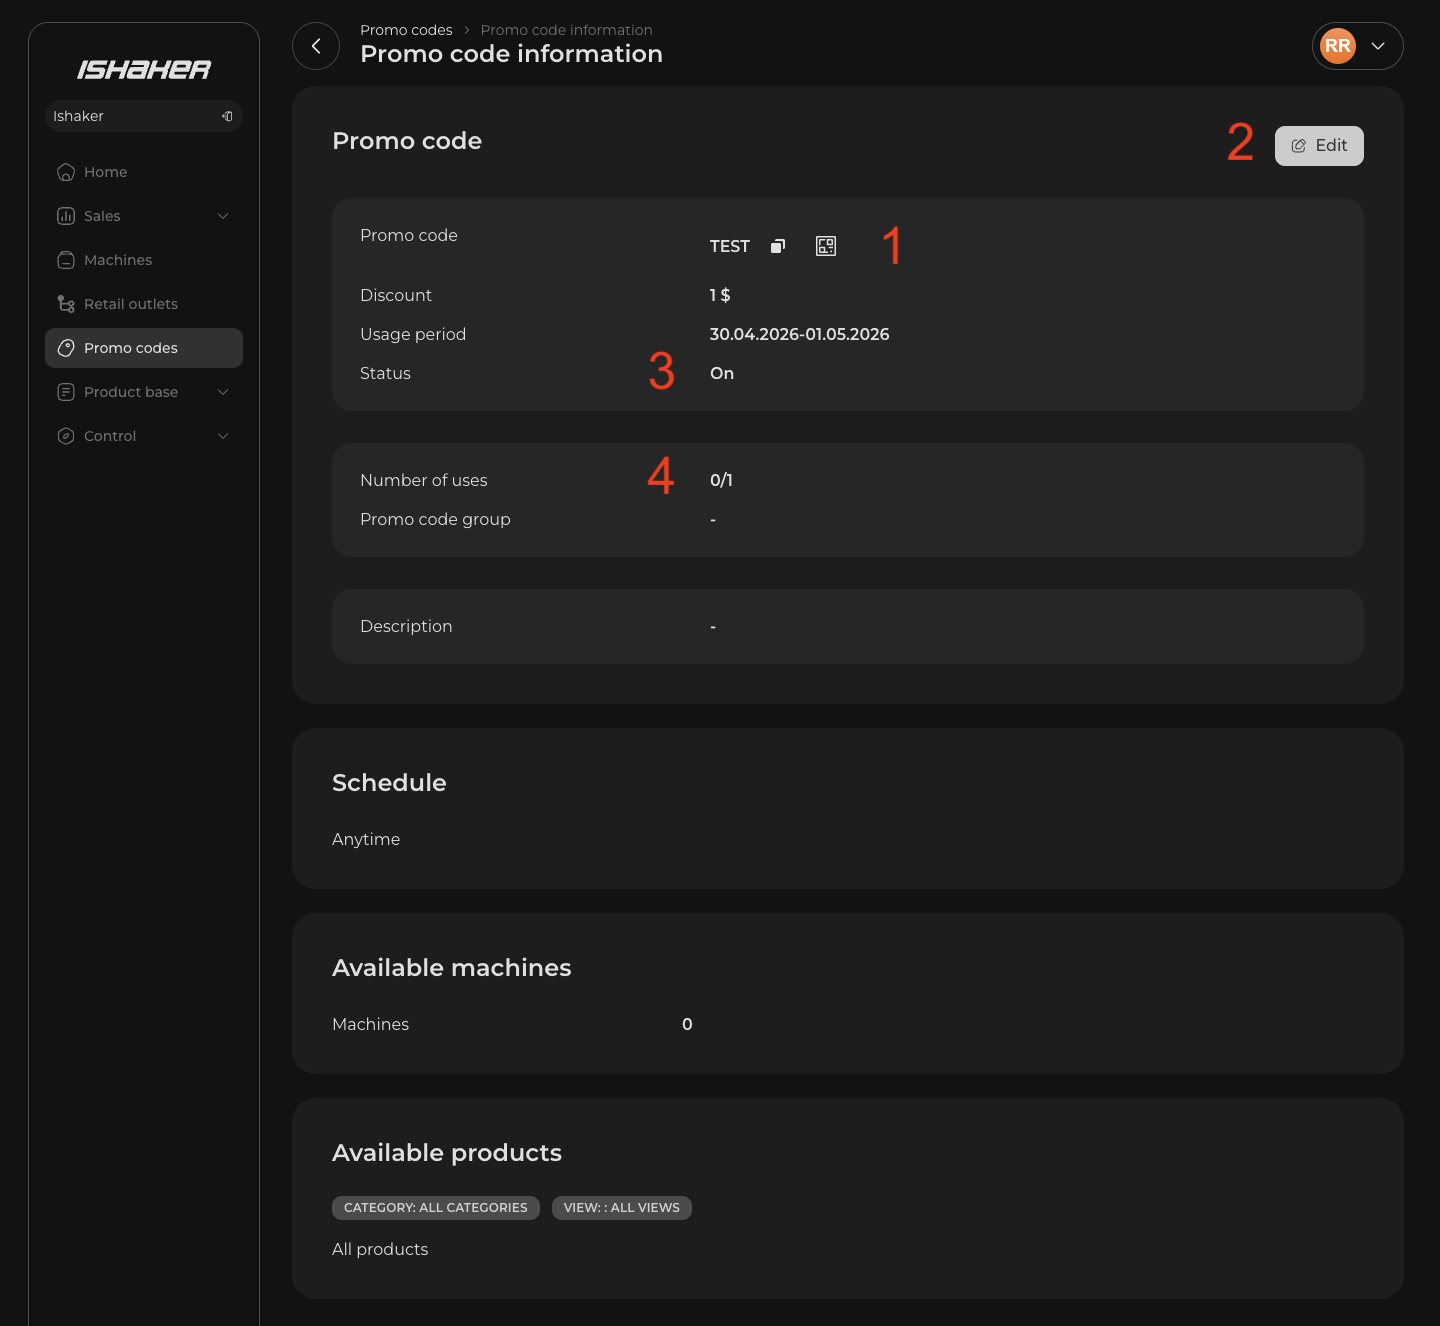
- 1. The QR icon next to the code name — click it to open the QR window for this code.
- 2. Edit button (top-right) — lets you change any field of the code.
- 3. Status — current code state (On / Off): you can pause a code without deleting it.
- 4. Number of uses — live counter of redemptions (for example
0/1: 0 used out of 1 allowed).
After clicking the QR icon, a window opens for printing or downloading:
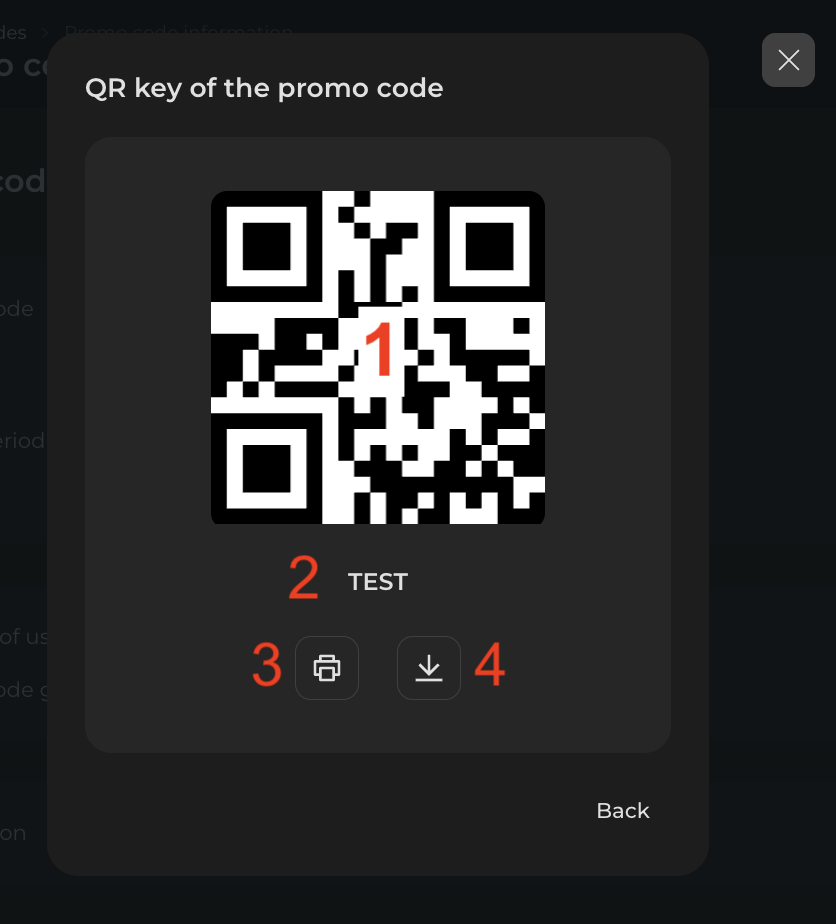
- 1. The QR itself.
- 2. The code name underneath.
- 3. Print — send to printer.
- 4. Download — save as image for digital use.
The QR encodes the same code the customer would type, so a code and its QR are interchangeable. Post the QR by your machine or include it in marketing materials.
To print QRs for several codes at once, tick the checkboxes next to the codes in the list and click Qr-code in the toolbar — you’ll get a single page with all the selected QRs.
Review usage statistics
In the codes list, tick the checkboxes next to the codes you want a report for and click Export to Excel in the toolbar. You’ll get an Excel file with every redemption of the selected codes — code, machine, date and time per row.
For a quick view of one code’s redemptions and current state, open its Promo code information page (see the previous section) — you don’t need to export to see that.
How customers use the code
At the machine, customers either type the code on the on-screen keypad or scan the printed QR. If the code is valid, the discount is applied to the order automatically.